

We can use the tar command in Linux to create archive files with the extension .tar.gz or .tgz, which are also referred to as tarball files. These compressed tarball files can then easily be shared among users or can be transferred to different locations. There are many different names for this command which include bzip, gzip, tarball, etc.
A plethora of options is provided by the tar command that can be used to either change the compression technique or type, etc. However, you only need to remember a handful of them which will help you to compress easily and extract tarball files. Also, please note that the tar command in all the popular GNU Linux distributions has an in-built compression mechanism that first creates the tarball file and then tries to compress it using bzip2 or gzip mechanisms. Hence, the resulting file extension is .tar.bz2 or .tar.gz.
There are many benefits of creating archived or compressed tarball files instead of simply storing the files in their native state. For example, it saves you a lot of storage space because it will now be compressed. Moreover, while sharing them, it will save you a lot of bandwidth as well.
In this tutorial, we will mainly focus on the tar command in Linux, and we will try to compress and extract files and directories using this command. We will use several options along with this command and even try to change the default compression technique.
Please note that, before you move ahead with this tutorial, you will need access to a Linux Machine and a Command-Line with sudo privileges (optional but preferable).
Compressing a Single Directory or File
We can compress an entire directory recursively or a single file using the following command.
$ tar -czvf <final-tar-file.tar.gz> </source/directory/path>
In the above command,
- -c option: used to instruct the command to perform compression instead of extraction.
- -z option: tells the command to use the gzip compression technique.
- -v option: It is shorthand for verbose, which tells the tar command to display the progress of the whole compression process.
- -f (file) option: allows you to mention or define the file name or path.
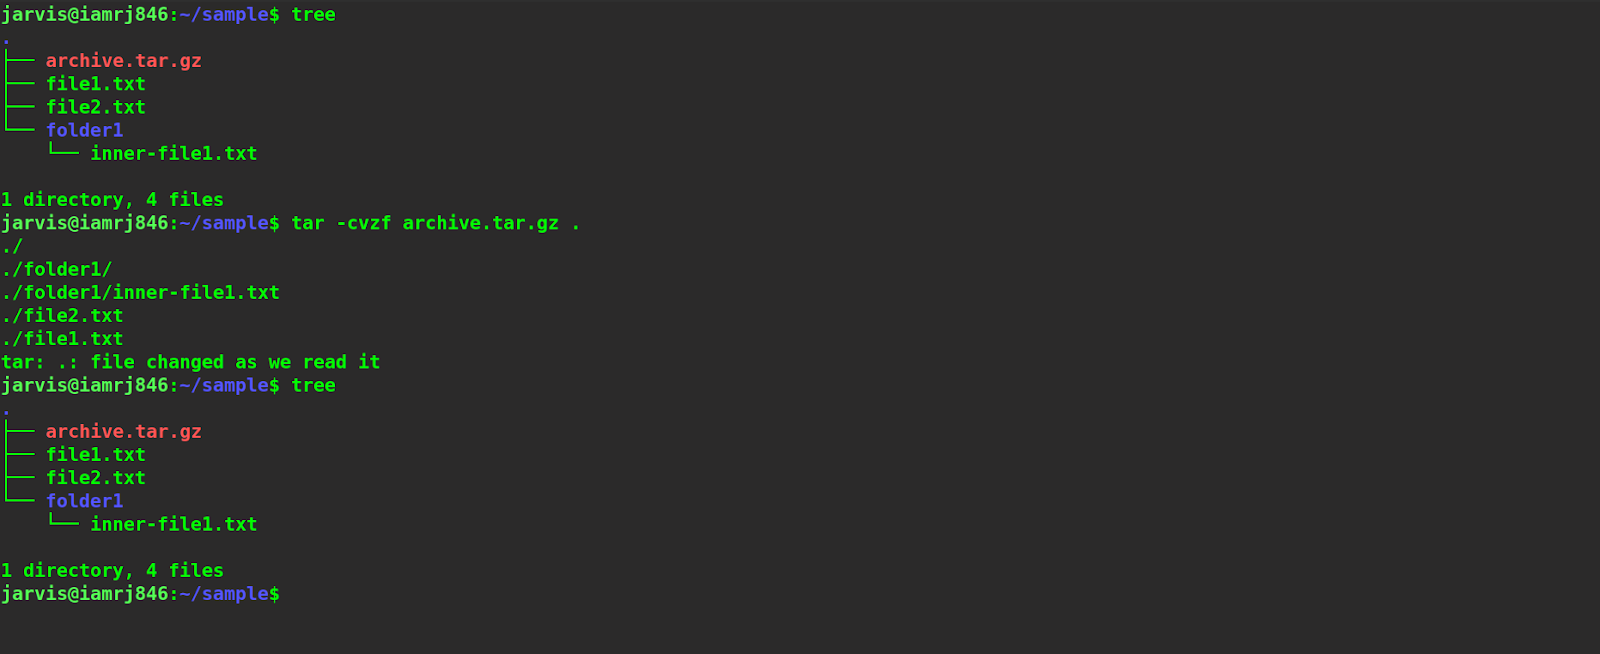
For example, let’s try to compress a directory called sample that has sub-directories as well as files inside it to create a new tarball file called archive.tar.gz.
$ tar -cvzf archive.tar.gz .
The dot specifies the command to compress the current directory which is the sample directory.
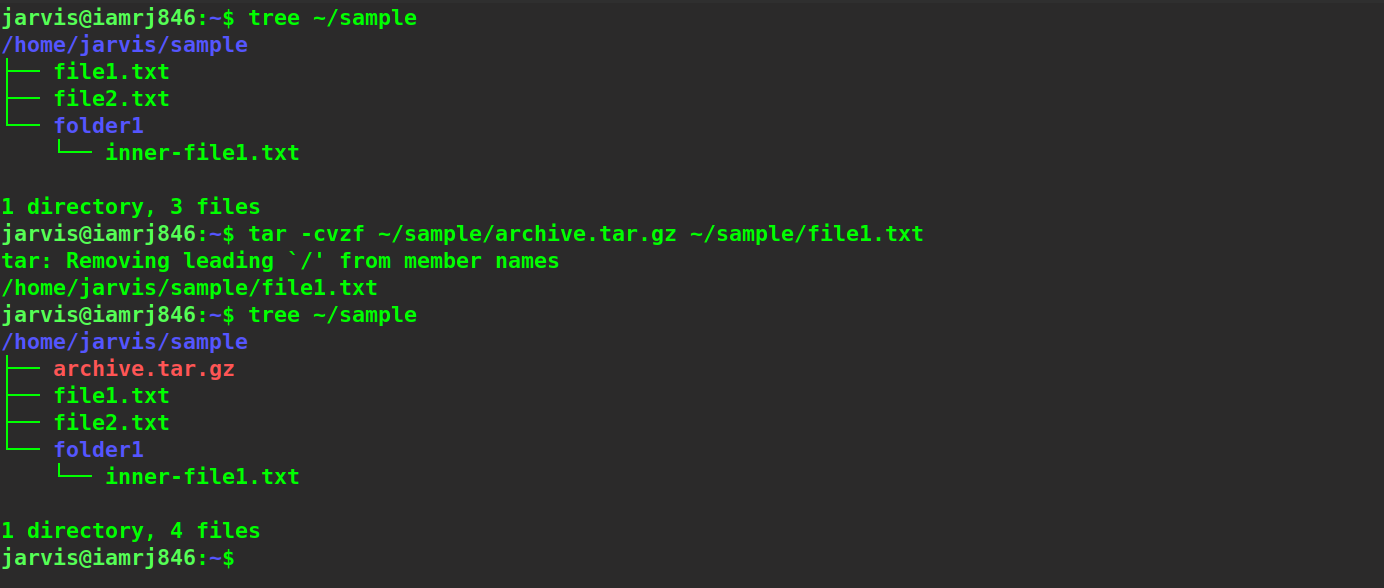
 If we want to compress a file using the tarball command simply, we can do it using this command -
$ tar -cvzf archive.tar.gz ~/sample/file1.txt
Compressing Multiple Files and Directories
We can also use the tar command in Linux to compress more than one directory or file simultaneously. All we need to do is to specify the paths of all the directories or files separated by spaces.
For example, let’s try to compress two folders and two files in the below example using the tar command.
$ tar -cvzf archive.tar.gz file1.txt file2.txt folder1 folder2
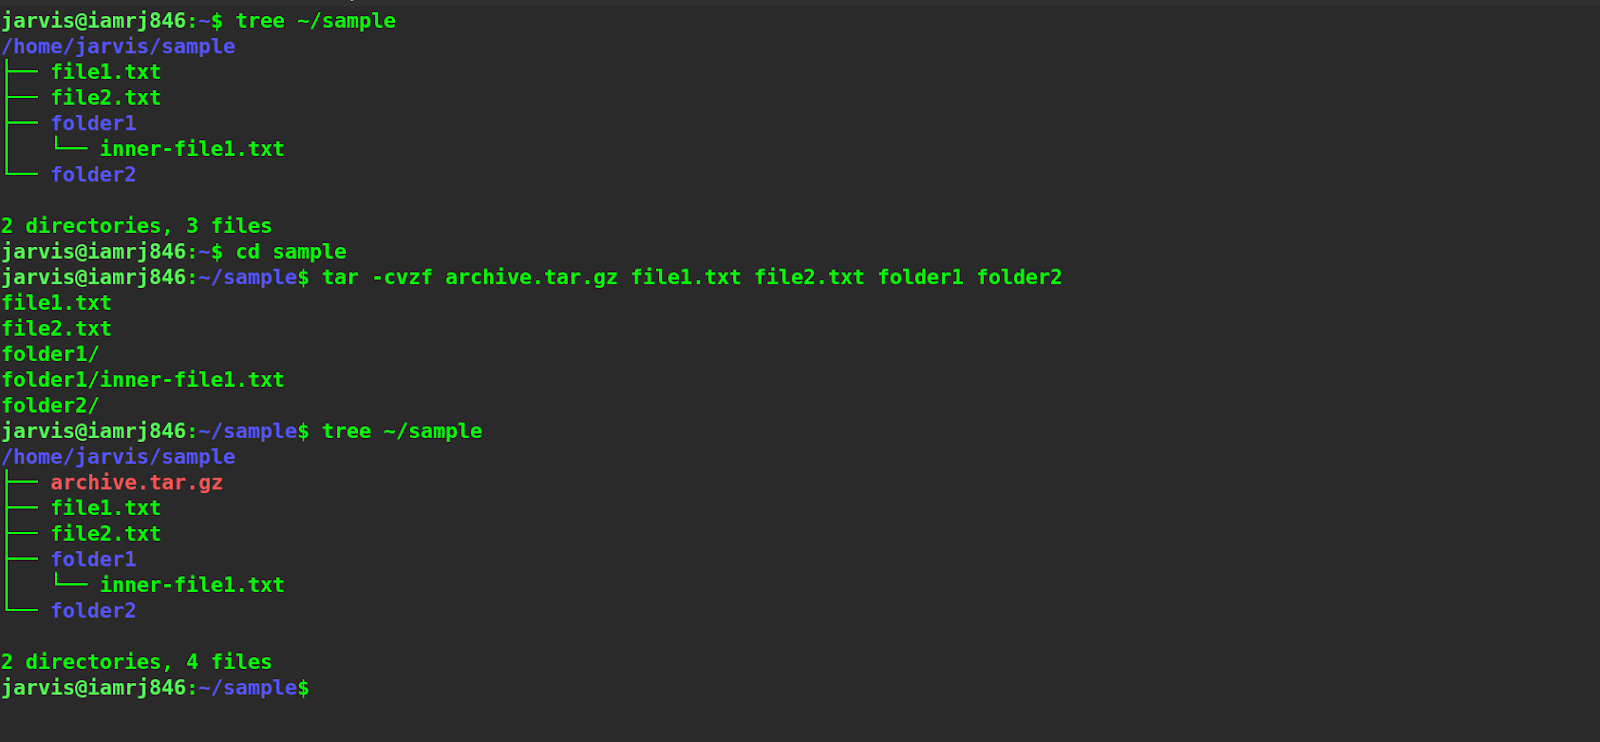 You can see that all the files and directories have been compressed, as mentioned in the above screenshot.
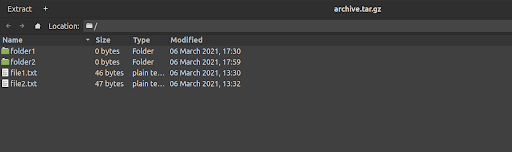
Let’s see what we have inside the archive file.
Excluding Files and Directories
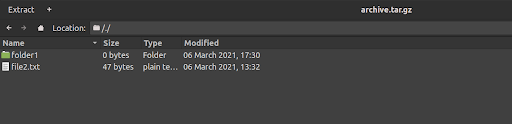
For instance, if we want to compress almost an entire directory except for a few files or sub-directories inside it, we can use the --exclude option for each of the files or directories that we want the tar command to ignore.
For example, let’s try to ignore a file and a sub-directory in our sample directory.
$ tar -cvzf archive.tar.gz --exclude=file1.txt --exclude=folder2 .
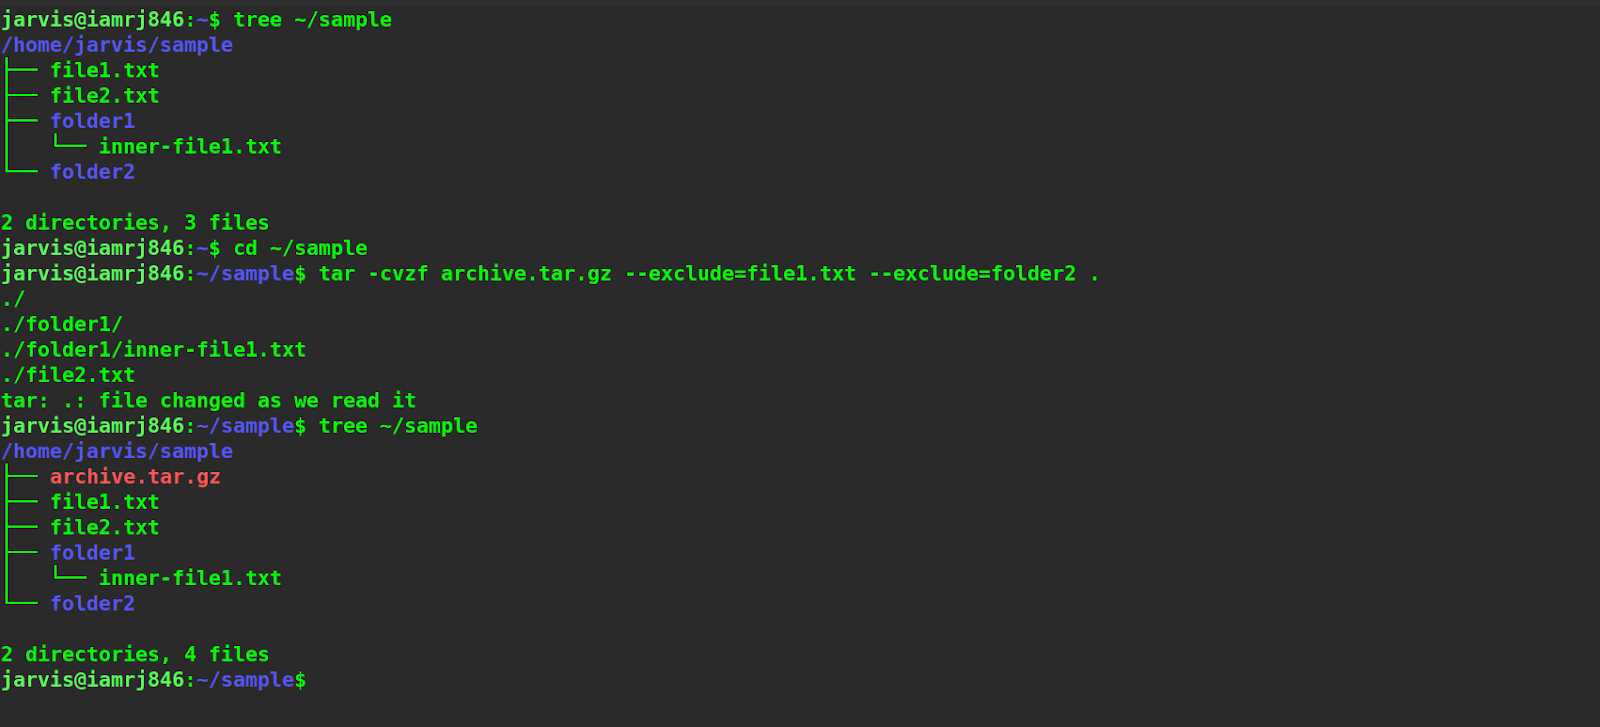 Let’s check out the content of the tar file to verify the exclusion of the mentioned directories and files.
In fact, you can also specify patterns to exclude files of certain specific types. For example, let’s try to exclude all the text files using a glob.
$ tar -cvzf archive.tar.gz --exclude=*.txt .
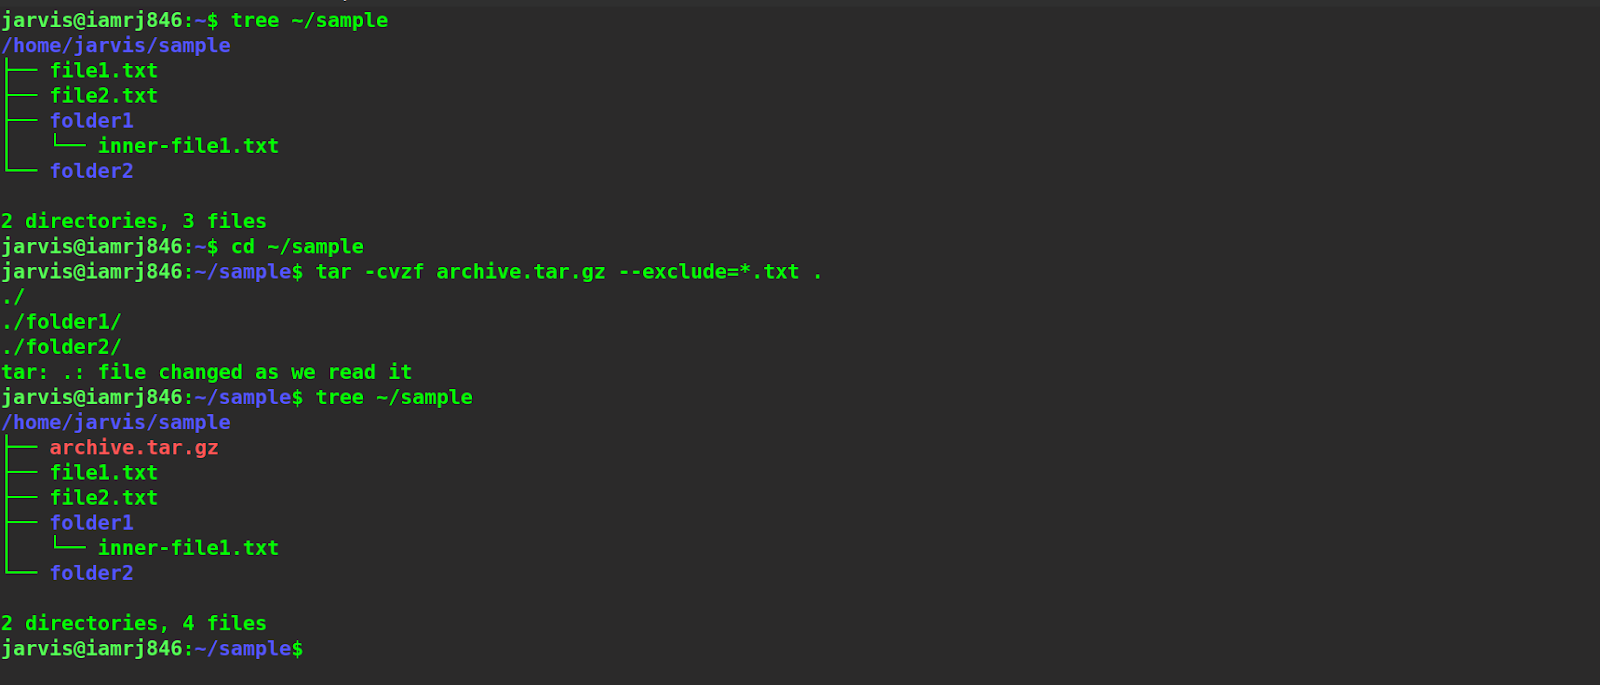 Let’s see whether all the text files have been excluded or not.
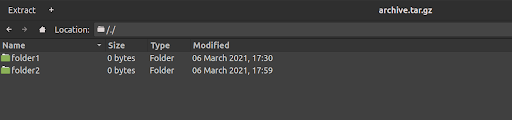
You can see that both text files have been successfully excluded from our compression process.
Using the bzip2 Technique for Compression
Mostly, the technique used for compression using the tar command in Linux is gzip which creates compressed files with extensions such as .tar.gz, .tgz, etc. However, we can also change the compression technique to .bzip2 by simply replacing the -z option with -j option in our command. This will create archives with extensions such as .tbz, .tar.bz2, .tar.bz, etc.
While we can agree that the process of compression is faster in the case of gzip, however, the extension of compression is less. This means that when compared to bzip2, the final archives have a larger size for gzipped files. Let’s try to compress a directory using bzip2 compression method.
$ tar -cvjf archive.tar.bz2 .
 You can see that our compressed file has been created.
Extracting a Compressed Tarball File
To extract tarball files that were compressed either using gzip or bzip2 techniques, we just need to replace the -c option with -x option in the command.
$ tar -xvjf archive.tar.bz2
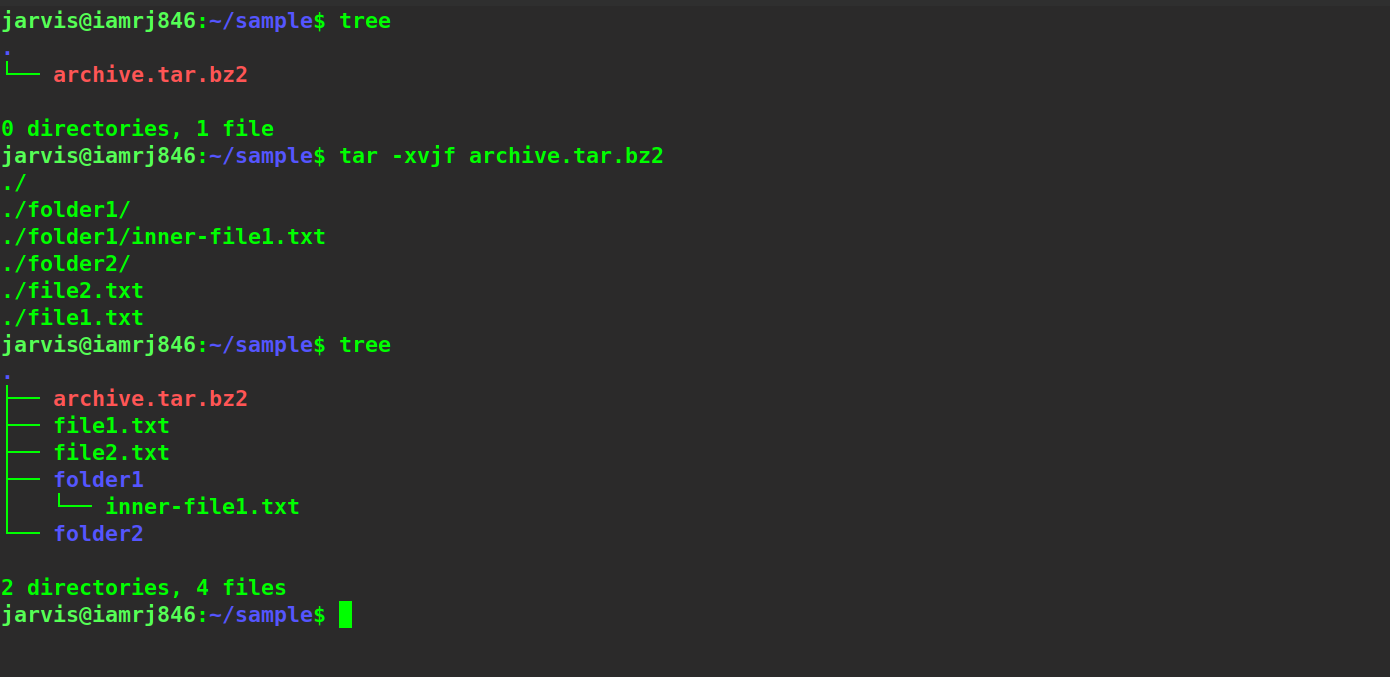 Using the above command, we have extracted a bzip2 compressed archive file. If you want to extract the contents to a particular directory, we can do it using
-C
option as mentioned below.
Using the above command, we have extracted a bzip2 compressed archive file. If you want to extract the contents to a particular directory, we can do it using
-C
option as mentioned below.
$ tar -xvjf archive.tar.bz2 -C ~/Documents
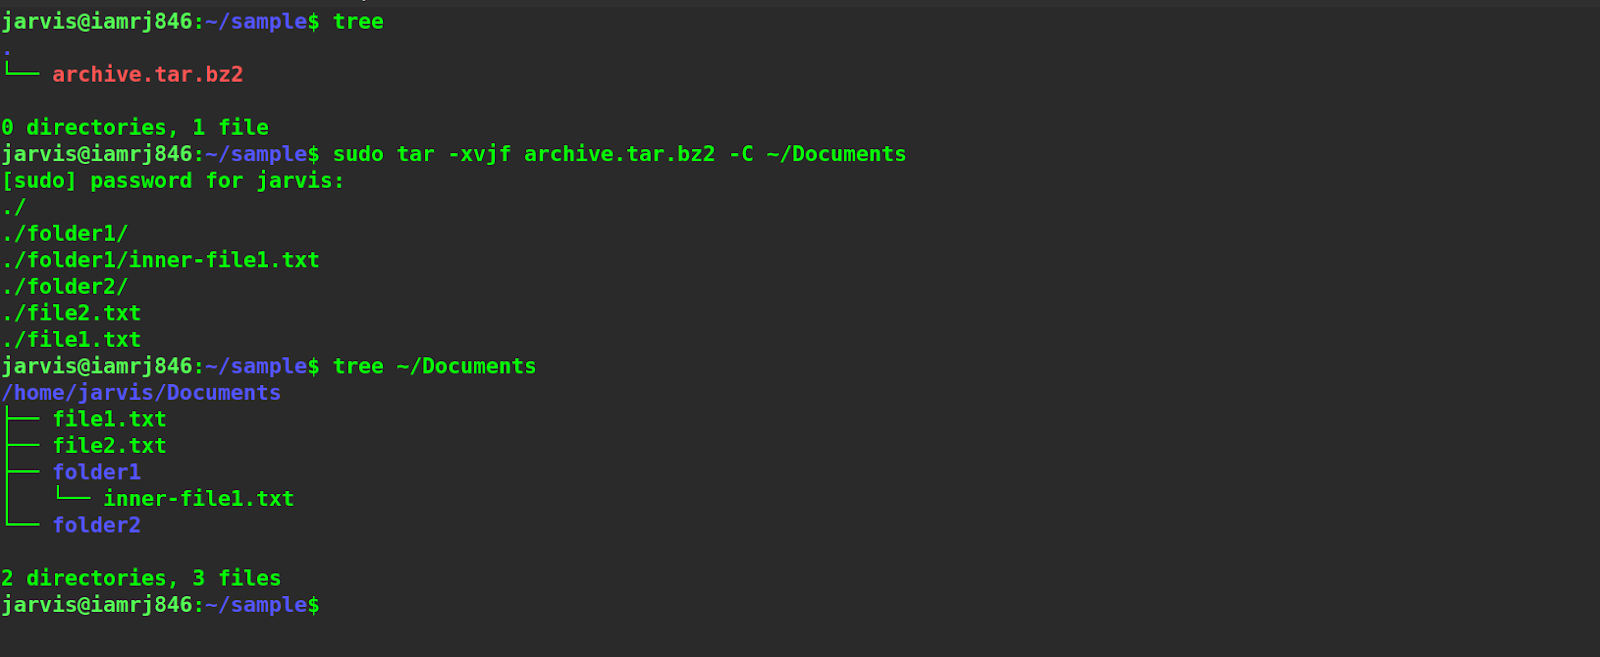 You can see that we have extracted the bzip2 file in the documents directory this time.
Wrapping Up!
In this guide, we have seen the easiest implementations of the tar command in Linux that can be used to compress or extract files using different compression methods such as gzip, bzip2, etc. We have used a handful of options along with the tar command. However, there are tons of options that this command provides and can be easily checked out using the --help option with the command.
In this tutorial, we started off with a general introduction to tarball files and the tar command. We then discussed how to compress a single directory or a file using the tar command and then did the same for more than one directory and file. We then used the exclude option to exclude files from being compressed and tried the bzip2 method for compression as well.
Finally, we used the tar command to extract tarball files and used the -C option to change the location for extraction. We certainly hope that through this comprehensive guide, you will be able to get hands-on with the tar command in Linux.
People are also reading:
- rmdir Command in Linux
- pwd Command in Linux
- How to Use cd Command in Linux?
- How to Unzip Files in Linux?
- What is Terminal and Why You Need to Use it?
- How to Install Docker Compose in Linux?
- How to install Google Chrome on Ubuntu 20.04?
- How to create users in Linux?
- How to use CHMOD command in Linux?
- SED command in Linux


Leave a Comment on this Post