

Linux is one of the best multi-user operating systems as it allows multiple users to operate and interact with each other simultaneously on the same machine. Linux uses a method called ownership to record which files and directories belong to which users. Also, it helps to keep a record of the permissions that different users have to access the system's resources. In Linux, it is possible to define the permissions for different users and groups to access various files and resources. Each user has their unique User ID, and the users with the same privileges can be grouped into Linux groups. Users in Linux are categorized into two categories, namely system users and normal users. Typically, the UID of system users is < 1000, and that of normal users is > 1000. When a file is created in a Linux machine, the user who creates the file becomes its owner, and the group of that file is the same as the group in which the user resides. We can use the chown (change ownership) command in Linux to change the ownership-related details of files in a Linux system. These details may include user ownership, group ownership, or both. Also, note that the group owner can be changed by the user who created the file, but the user ownership of a file can be changed only by a system or root user . Now, let us discuss the CHOWN command in Linux and understand how it works.
How to Use the CHOWN Command in Linux?
Reasons for Changing Ownership
There are several reasons for changing the ownership of a file in Linux. You might feel that a particular file can expose the important information that it holds to another user. Or you might be moving a file from one Linux machine to another, and hence you wish to change the user and group ownership of that file. Also, you may want to change the ownership of a file in case its owner, who is a part of your team, exits the team, and you want to hand over the responsibility to manage that file to someone else.
View the Current Ownership
To view the current ownership details of a file, we can use the ls -l command on that particular file.
$ ls -l ~/Documents/file1.txt
Output

In the above output, the first parameter tells us the permissions that the current user has on the file, the second parameter tells us the file type, the third and the fourth parameters defines the username and the name of the group that the file belongs to, the next one is the date of last modified, and the final parameter is the path of the file.
Chown Command
The chown command in Linux has the following syntax:
$ chown [options] user[:group] files
In the above command, the user denotes the username or the UID of the user for whom we want to change the permission and who is also a part of a group. Please note that if we specify only the user (without the colon) or only the group (after a colon), then only those particular parameters will be changed for the files. If we specify only a user and a colon after that, the user will be changed, and the group will also be changed to the user's group.
Change the User Ownership
Let's change the file's ownership by using the username or the UID of the user along with the file name.
$ sudo chown test ~/Documents/file1.txt
Output
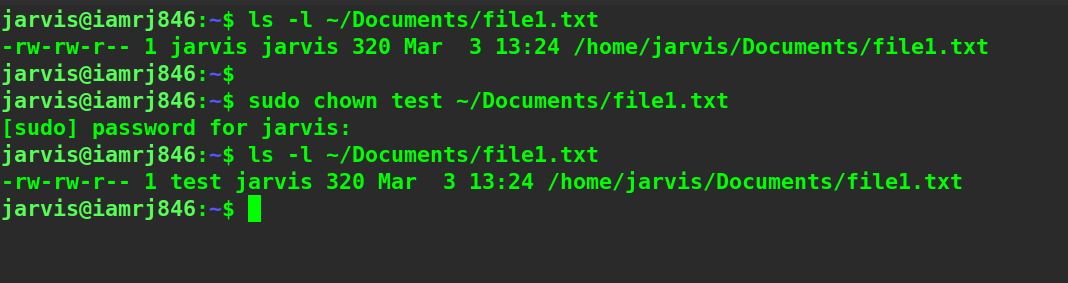
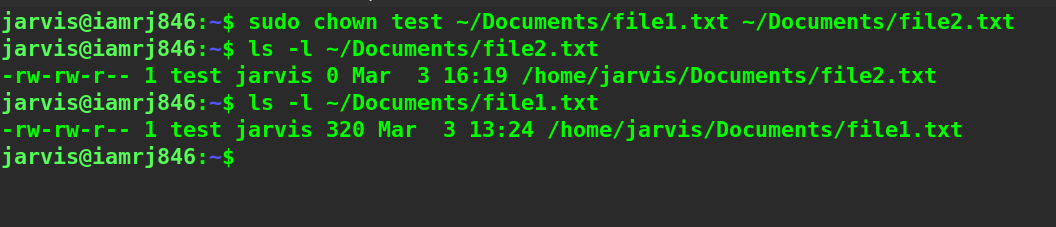
Note that you need to have sudo privileges to change the ownership of a file. In the output shown in the screenshot above, you can see that the user ownership has been changed. To change the user ownership for more than one file, you can mention the names or paths of all the files separated by a space as shown in the following example: $ sudo chown test ~/Documents/file1.txt ~/Documents/file2.txt
Output
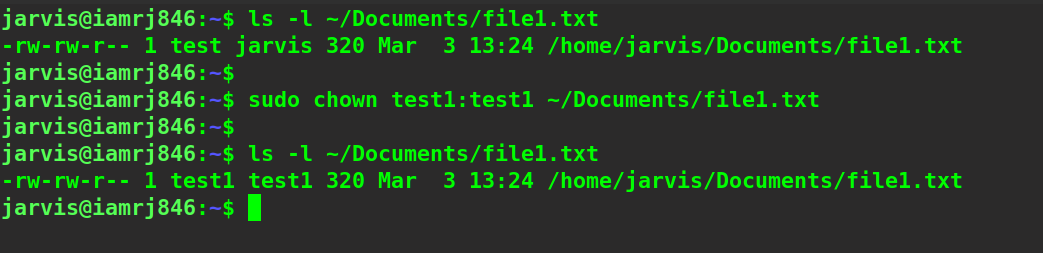
Change Both the User and Group Ownership
Let's try to change both the ownerships for a file. We need to mention the new user and the group separated by the colon without any spaces between them and the name of the files.
$ sudo chown test1:test1 ~/Documents/file1.txt
Output
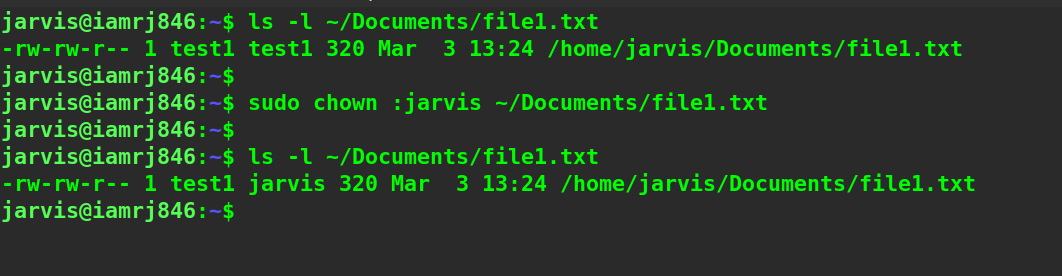
Change only the Group Ownership
We can specify the name of the group after the colon to change only the group ownership of the file.
$ sudo chown :jarvis ~/Documents/file1.txt
Output
Change the Ownership of All Files and Sub-Directories
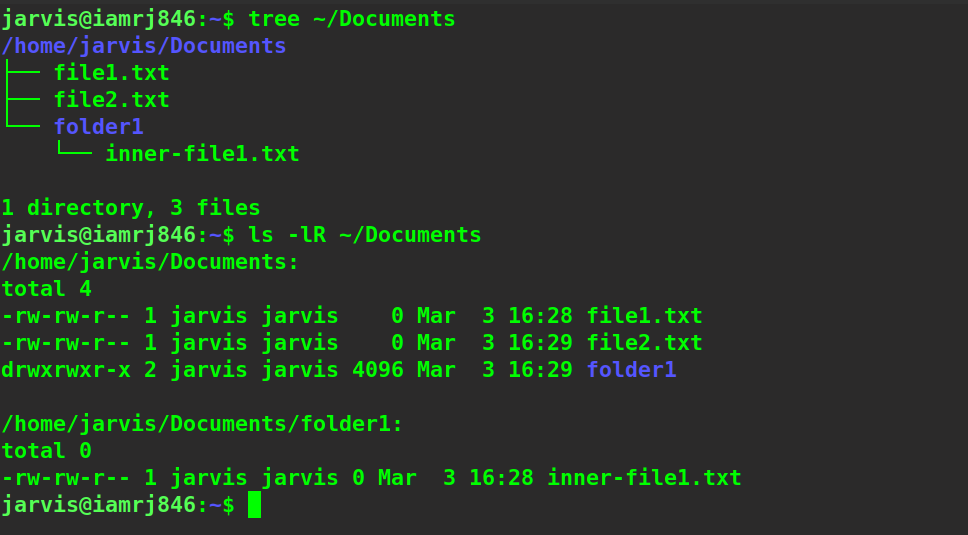
We can also change the ownership of all the files and sub-directories inside a directory recursively by using the -R option with the chown command. This will traverse through all the files and directories inside the parent directory that we mention one by one recursively and keep on changing their ownerships. The current ownerships can also be found out recursively by using the following command:
$ ls -lR ~/Documents
Output
Now, let us change the ownership of all the files and subdirectories within the Documents directory by using the chown command with the -R option.
$ sudo chown -R test:test ~/Documents
Output
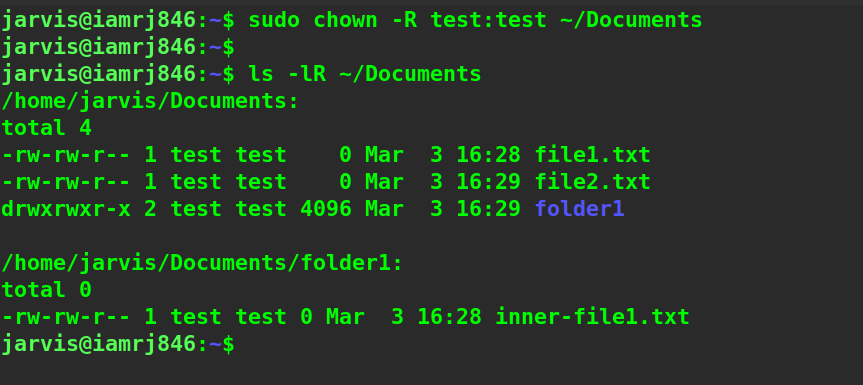
You can see that the ownership of all the files and sub-directories has been changed.
Wrapping Up
In this detailed article, we skimmed through the concept of users and groups in Linux. We then discussed some reasons why someone might want to change the ownership of files and directories. After that, we explained how we could use the ls command to view the current ownership details and highlighted the syntax of the chown command in Linux. Later, we discussed how we could use the chown command to change only the user ownership and change only the group ownership for files. We then discussed how we could change them simultaneously. Finally, we mentioned how you can use the ls command and the -R option to check the ownership of a directory recursively and get the details of all the files and sub-directories within that directory. We then demonstrated the use of the -R option along with the chown command to change the ownership of all the files and sub-directories present within a directory. We hope that this comprehensive guide will help you to work around the chown command in Linux and change the ownership of files as per your requirements. People are also reading:
- How to use LN Command to create Symbolic Links in Linux?
- rmdir Command in Linux
- PING Command in Linux
- ls Command in Linux
- pwd Command in Linux
- How to use mkdir command in Linux?
- How to Use cd Command in Linux?
- Find Disk Usage using DU command in Linux
- Remove files and directories using Linux Command Line
- Basic Linux Commands for Beginners


Leave a Comment on this Post