

SIFT is among the most popular feature detection algorithms. Continue reading below to know how to accomplish SIFT feature extraction using OpenCV in Python. So what are the features in an image?
Although there is no exact or universal definition of the features in an image, simply put, the features in an image are the information that defines the image.
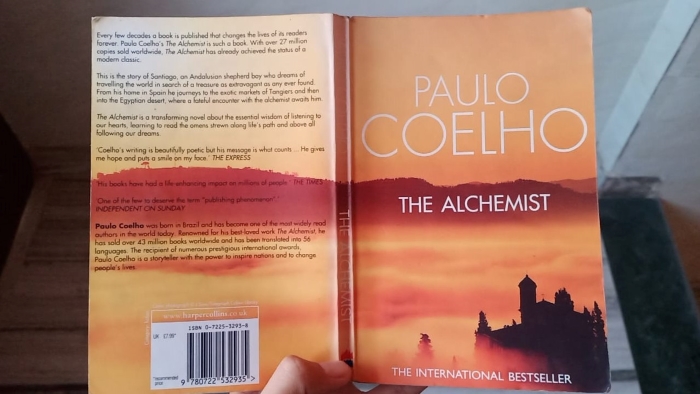
Let's say, we have an image of the book cover of "
The Alchemist.
"

And if we talk about its features, everything in the image is the features of the image. All the letters, edges, pyramids, objects, space between the letters, blobs, ridges, etc. are the features of the image.
To detect these features from an image we use the feature detection algorithms. There are various feature detection algorithms, such as SIFT, SURF, GLOH , and HOG .
For this Python tutorial, we will be using SIFT Feature Extraction Algorithm Using the OpenCV library and extract features of an image. There are many applications of image feature detection and comparing two images is one of the most important applications.
So here in this Python tutorial, first, we will write Python code to detect or extract features in an image using the Scale Invariant Feature Transform (SIFT) algorithm and OpenCV. Then we will compare the two images based on the extracted features. Before we jump to the Python code, let's install the dependencies.
Installing Dependencies
Install Python OpenCV Contribution Library
Unfortunately, the OpenCV library does not come with the implementation of SIFT algorithms. Thus, we will be installing the community contribution OpenCV library, which supports all the features provided by the standard OpenCV library and many more. To install the community contribution version of Python OpenCV, run the following pip command on your terminal or command prompt:
pip install opencv-contrib-python
This command will install the
opencv-contrib-python
library for your Python environment. To install numpy, run the following pip command:
pip install numpy
Image
For this tutorial, we will be using the following image
"book.jpg."
We would suggest you save the image file in the same directory of your Python script, so you can easily load the image with a relative path. Now we are all done with the dependencies.
So, let's open your favorite Python IDE or Text editor and start coding.
How to Perform SIFT Feature Extraction Using OpenCV in Python?
Let's start with importing the module with the following command:
import cv2 as cv
After importing the module, load the image using the OpenCV
cv.imread()
method as shown below:
#load image
image = cv.imread("book.jpg")
After loading the image, convert the image into a GrayScale image because we do not want to perform the feature extraction on the default Blue, Green, and Red (BGR) image. Doing so will have no effect on extracting features. To convert a BGR image to GrayScale, we use the OpenCV
cv.cvtColor()
method as shown below:
 #convert to grayscale image
gray_scale = cv.cvtColor(image, cv.COLOR_BGR2GRAY)
Now, let's load the SIFT algorithm by initializing its object. To initialize the SIFT object we can use the
cv.SIFT_create()
method:
#initialize SIFT object
sift = cv.SIFT_create()
Now with the help of the
sift
object, let's detect all the features in the
image.
And this can be performed with the help of sift
detectAndCompute()
method:
#detect keypoints
keypoints, _= sift.detectAndCompute(image, None)
Here, we are detecting the
keypoints
in the image, and the
None
is the attribute value for the
mask
. Because here we are finding all the
keypoints
and features of the image, that's why the value of the mask is None.
The value of the mask can be provided when we are looking for the keypoints or features for a specific portion. The
detectAndCompute(image, None)
method returns two values, keypoints and descriptors.
For this program, we do not require
descriptors
and that's why we use the underscore
_
there. After detecting the features let's draw all the key points on the
gray_scale
image. To draw all the key points on an image we can use the
cv.drawKeypoints()
method.
#draw keypoints
sift_image = cv.drawKeypoints(gray_scale, keypoints, None)
Now let's see the sift_image with the
cv.imshow()
method:
#show image
cv.imshow("Features Image", sift_image)

#hold the window
cv.waitKey(0)
Now put all the code together and execute.
#Python Program to Extract Features from an image using SIFT Feature Extraction
import cv2 as cv

#load image
image = cv.imread("book.jpg")

#convert to grayscale image
gray_scale = cv.cvtColor(image, cv.COLOR_BGR2GRAY)

#initialize SIFT object
sift = cv.SIFT_create()

#detect keypoints
keypoints, _= sift.detectAndCompute(image, None)

#draw keypoints
sift_image = cv.drawKeypoints(gray_scale, keypoints, None)

cv.imshow("Features Image", sift_image)
cv.waitKey(0)
Output
When you execute the above program you will see a similar output like this:

From the above image, you can see that the OpenCV SIFT algorithm put all the key points on the image.
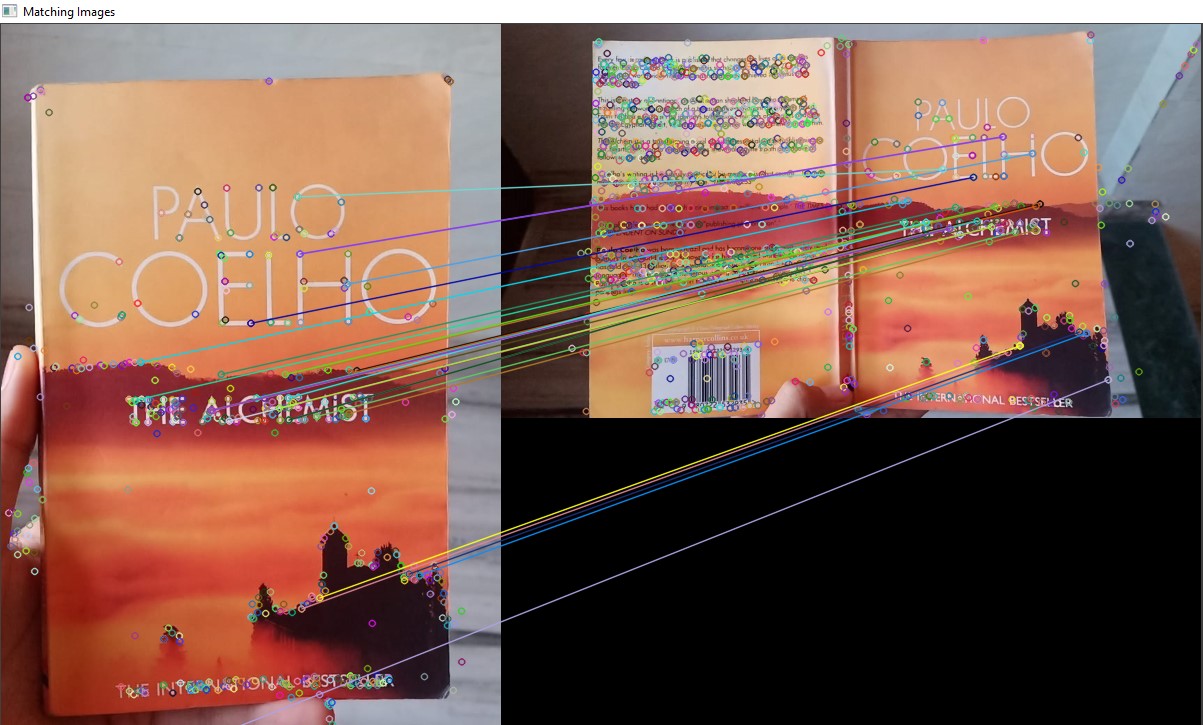
Match Two Images in OpenCV Using the SIFT Extraction Feature
Now that you know how to extract features in an image, let's try something. With the help of the extracted features, we can compare 2 images and look for the common features in them.
Let's say we have two images of a book. The first image, image1 , is the front cover of the book as shown below:

And the second image
image2
is the front and back cover of the same book:
Now, if we want to compare both the images and look for the common components then we have to first extract features from individual images and compare them. To extract the features from both the images we will use the SIFT algorithm and match the features with Brute Force Matcher.
Let's start coding. First, import the OpenCV module and load both the images:
import cv2 as cv

#load images
image1 = cv.imread("image1.jpg")
image2 = cv.imread("image2.jpg")
Next, convert both the images into GrayScale images:

#convert to grayscale image
gray_scale1 = cv.cvtColor(image1, cv.COLOR_BGR2GRAY)
gray_scale2 = cv.cvtColor(image2, cv.COLOR_BGR2GRAY)
Initialize the SIFT object and detect
keypoints
and descriptors(
des1, des2
) from both the images
image1
and
image2
with the help of the
sift.detectAndCompute()
method:
#initialize SIFT object
sift = cv.SIFT_create()

keypoints1, des1= sift.detectAndCompute(image1, None)
keypoints2, des2= sift.detectAndCompute(image2, None)
Note
: The Descriptors define the features independent of the properties of the image. As we have Descriptors for both the images, now we can use the Brute Force Matcher to match the descriptors. The Brute Force Matcher will compare the descriptor and match the closest ones. To use the Brute Force Matcher in OpenCV first we need to initialize its object using the
BFMatcher()
class as shown below:
# initialize Brute force matching
bf = cv.BFMatcher(cv.NORM_L1, crossCheck=True)
Now match the descriptors
des1
and
des2
with the
bf.match()
method:
matches = bf.match(des1,des2)
The
bf.match()
method matches both the descriptors and returns a list of
matched objects
. And each
matched object
contains some information, including distance. The smaller the distance, the better is the match. So, let's sort all the
matches
based on the distance of individual
matched
objects:
 #sort the matches
matches = sorted(matches, key= lambda match : match.distance)
Now we need to draw all the matches with the help of
cv.drawMatches()
:
matched_imge = cv.drawMatches(image1, keypoints1, image2, keypoints2, matches[:30], None)
Here we are only drawing the best 30 matches with the
matches[:30]
parameter. Let's show all the matched images (matched_image) with the
imshow()
method:
cv.imshow("Matching Images", matched_imge)
cv.waitKey(0)
Now put all code together and execute.
#Python program to compare two Images with SIFT Feature Extraction
import cv2 as cv

#load images
image1 = cv.imread("image1.jpg")
image2 = cv.imread("image2.jpg")

#convert to grayscale image
gray_scale1 = cv.cvtColor(image1, cv.COLOR_BGR2GRAY)
gray_scale2 = cv.cvtColor(image2, cv.COLOR_BGR2GRAY)

#initialize SIFT object
sift = cv.SIFT_create()

keypoints1, des1= sift.detectAndCompute(image1, None)
keypoints2, des2= sift.detectAndCompute(image2, None)

# initialize Brute force matching
bf = cv.BFMatcher(cv.NORM_L1, crossCheck=True)

matches = bf.match(des1,des2)

#sort the matches
matches = sorted(matches, key= lambda match : match.distance)

matched_imge = cv.drawMatches(image1, keypoints1, image2, keypoints2, matches[:30], None)

cv.imshow("Matching Images", matched_imge)
cv.waitKey(0)
Output
Conclusion
In this Python tutorial, we learned how to detect features in an image using the OpenCV SIFT algorithm. The Standard OpenCV library does not provide SIFT algorithm implementation that's why here we have used its contribution version, which contains more features than the standard OpenCV module.
Here, you also learned how to compare two images using the SIFT algorithm.
People are also reading:


Leave a Comment on this Post