

There are many screen recording applications for different operating systems. With the help of these screen recording applications, we can record the screen while we are playing a video game, writing some code, researching something on the internet, and so on.
In this Python tutorial, we will discuss how to make a screen recorder in Python. Although Windows and macOS now come with a built-in screen recorder application, it would be cool if you knew how to build a screen recorder of your own using Python.
But before we dive into the Python implementation of the screen recorder, let's install the libraries we will be using in this tutorial.
Installing Libraries
1) The
pyautogui
Library
pyautogui
is a Python open-source third-party API that is used to control the mouse, keyboard, and other automated interactions. In this tutorial, we will be using this API to take screenshots and then using other libraries to chain those screen shows and create a screen recorder. To install
pyautogui
for your Python environment, run the following pip install command:
pip install pyautogui
2) The
opencv-python
Library
OpenCV is a Python computer vision library that is used to handle images and video files. In this tutorial, we will be using this library to write video data. As a video is a collection of images, so here we will use the OpenCV library to write all the screenshots captured by the
pyautogui
API. Use the following pip command to install the OpenCV library:
pip install opencv-python
3) The
numpy
Library
NumPy is very popular among Python developers for its numerical computation and NumPy arrays. When you install
opencv-python
, it will automatically install numpy. To install the
numpy
library, use the following pip install command:
pip install numpy
Now that we are all set with installing all the required libraries, let's write the Python code.
How to Make a Screen Recorder in Python?
Let's start with importing the required modules.
import cv2 as cv
import pyautogui
import numpy as np
Now, let's get the screen size of our display using the pyautogui.
size()
function.
#(width,height)
screen_size=pyautogui.size()
Next, we need to initialize the
VideoWriter()
object that will write the video frames.
#initialize the object
video = cv.VideoWriter('Recording.avi',
                        cv.VideoWriter_fourcc(*'MJPG'),
                        20,
                        screen_size)
-
Recording.aviis the file name of the video that we will be recording. -
cv.VideoWriter_fourcc(*'MJPG')will set the four-character code that compresses the frames. -
20is the framerate of videostream. -
screen_sizeis the height and width of the video frame.
Now, we need to create a loop that will capture the screenshot of the display and write those images in the
video
object.
print("Recording.....")
while True:
    #take screenshot
    screen_shot_img = pyautogui.screenshot()

    #convert into array
    frame = np.array(screen_shot_img)

    #change from BGR to RGB
    frame = cv.cvtColor(frame, cv.COLOR_BGR2RGB)

    #write frame
    video.write(frame)

    #display the live recording
    cv.imshow("Recording Frame(Minimize it)", frame)
    if cv.waitKey(1) == ord("q"):
        break

cv.destroyAllWindows()
video.release()
-
The
screenshot()function will capture the screen. -
array(screen_shot_img)will convert the screen_shot_image into a numpy array because OpenCV is supposed to work with numpy arrays. -
cvtColor()will change the color format of the image from BGR to RGB because OpenCV, by default, writes images in BRG format, so it's important to convert them into RGB. -
The
write(frame)function will write the frame into the video object. -
imshow()will display a live video recording. For better performance, you can minimize the recording frame window. - To close the screen recording, either press "q" on the live recording screen or kill the program by typing CTRL+Z.
Now put all the code together and execute.
Python Program to Make a Screen Recorder
import cv2 as cv
import pyautogui
import numpy as np

#(width,height)
screen_size=pyautogui.size()

#initialize the object
video = cv.VideoWriter('Recording.avi',
                         cv.VideoWriter_fourcc(*'MJPG'),
                         20, screen_size)

print("Recording.....")
while True:
    #click screen shot
    screen_shot_img = pyautogui.screenshot()

    #convert into array
    frame = np.array(screen_shot_img)

    #change from BGR to RGB
    frame = cv.cvtColor(frame, cv.COLOR_BGR2RGB)

    #write frame
    video.write(frame)

    #display the live recording
    cv.imshow("Recording Frame(Minimize it)", frame)
    if cv.waitKey(1) == ord("q"):
        break

cv.destroyAllWindows()
video.release()
Output
Recording.....
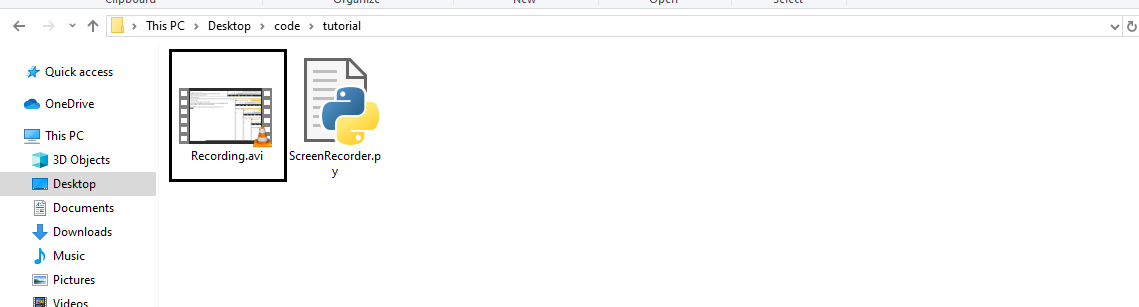
After successfully executing and recording the screen, you can check the directory where your Python script is located. There you will find the
Recording.avi
video of your screen recording.
Conclusion
In this Python tutorial, we learned how we could code for a simple screen recorder in Python. To sum up the above program, we just create an infinite loop, and inside it, we keep capturing the screenshot and writing its data in the
"recording.avi"
file that makes a video. Also, to handle all the complex algorithms and conversion, we used Python
pyautogui
,
opencv-python
, and
numpy
libraries.
We hope you like the above article and if you have any queries related to the above program, please let us know by commenting down below.
People are also reading:
- Port Scanner in Python
- How to Make a Process Monitor in Python?
- Make an Email Extractor in Python
- How to Manage Files in Python?
- Crack PDF Files Passwords in Python
- How to Make a URL Shortener in Python?
- VADER in Python
- Python Google Page Ranking
- Edge Detection in Python
- Python Assembly, Disassembly, and Emulation


Leave a Comment on this Post