

Mounting refers to connecting one external device with another. This is helpful in tasks like backup, extending the storage space, and volume mounting. In this article, we will look into the mount command along with its examples.
What is Mounting of FileSystem
Mounting implies connecting your external drive to your computer so that your operating system can identify it and execute data processing with the disc straight away. If you can locate your drive in your operating system's file explorer, it implies it is "mounted." If you have worked with containers, you might have used this command when mounting volumes of containers. The concept of mounting here remains exactly the same as in containers.
What does the mount command do?
Files in Linux are present in the form of a tree. Initially, only the root directory is mounted in the filesystem. You can attach more files and directories using the mount command. mount command in Linux is used to mount the filesystem found on a device to the tree structure of the Linux rooted at ‘/‘. The syntax of the command is
mount -t type device dir
By default, the mount point is /etc/fstab
Examples of using the mount command in Linux
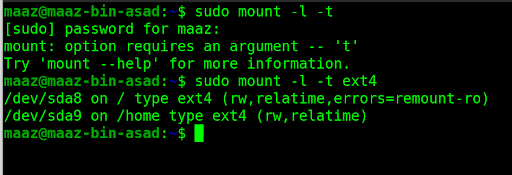
List mounted systems
To list the already mounted systems, use
-l
option with the command.
Mount filesystem
To mount a file system, use the following command

Mount in read-only mode
To mount a system in read-only mode, use the following pair of commands and options

Unmount a file system
Now, we will unmount the same system that we mounted earlier. For this, we use
umount
command.

Conclusion
In this article, we saw how the mount command in Linux can be used for major tasks like extending our storage and backing up our data. This command is very helpful for developers, especially when they work with containers, as they need to mount the volumes regularly on external devices.
People are also reading: