Create the first Project
You can create your first project on Angular by using Angular CLI and running below mentioned commands.
|
ng new my-first-angular-app
|

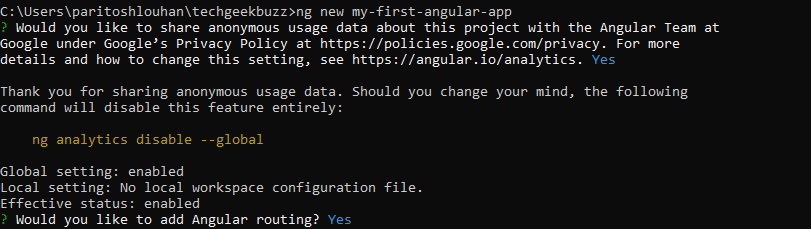
While creating the application, it will prompt you with numerous options. Like in the above screenshot, it has prompted if it can send the anonymous usage data to the Angular team. For this, I have selected Yes.
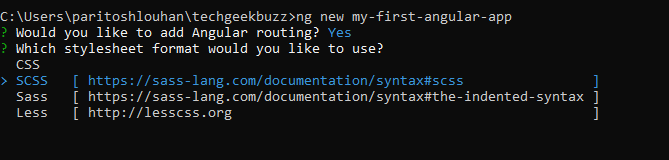
After that, it will prompt you if you want to add Angular routing to the application. If you select yes, then CLI will add and import the necessary package for routing. If you select no, then you have to install it manually. We should always accept this option, as adding manually can be tedious.
|
|
After that, it will prompt for the stylesheet format. There are many stylesheet formats available. You can study them. The most frequently used stylesheet is SCSS. Hence, I have selected that in the prompt. After navigating to your choice of stylesheet format, press the enter key.
|
|
When you select the stylesheet format, it will take a couple of minutes to install all the packages and libraries. In the end, a message will appear that it has successfully created the project and initialized the git.
If this message appears in your command prompt, you can open your solution in VS Code or Webstorm and run the below command.
|
npm install - It will install all the packages added to your application. |
|
ng serve - It will build your application and serve you at a port. Mostly at 4200. |
Go to your web browser and open https://localhost:4200 to see your application hosted.