

In this article, we will discuss the cp command in Linux. It helps to easily copy directories and files in Linux file systems or any other Unix-based files systems. We will walk you through a detailed guide that will help you get started with the syntax of the cp command and its use cases. The Linux command-line can be quite intimidating sometimes. However, at some point in time, you will start finding it useful even more useful than those interactive GUI-based file managers that allow you to manage and manipulate files interactively. As a Linux user, the most common operations you might want to perform using the command-line interface include creating, manipulating, and deleting files and directories, managing users and permissions, installing packages, and creating symlinks. Managing directories and files through the terminal in Linux can be a useful way to get a birds-eye view of the directories as a tree structure and then perform an operation on them either by filtering them using regular expressions or using the find command.
How to Use the cp Command in Linux?
Using the cp command, you can copy multiple directories and their contents, such as files, symlinks, metadata, and so on. Moreover, you can preserve their permissions, timestamps, etc. Next, let’s look at the syntax of the cp command in Linux:
$ cp [options] {path to source file of directory} {path to target file or directory}
The cp command will run in the current directory if no path is specified in the source path. Hence, if you try to copy the same file in the same directory, it will throw an error. This is because two files with the same name can’t exist in the same directory. Hence, you will be required to alter the name of the target file. What it does is that it will create a new file in the target location and rename it and copy the contents of the file inside it. Some options that you can use along with the cp command in Linux are:
- -p (preserve): It preserves the attributes of the files and directories such as permissions, timestamps, and so on.
- -i (interactive): This option will prompt confirmation before making any changes.
- -v (verbose): It will show the process by printing the details in the command line.
- -f (force): Using this option, you will be able to force the copy even if the file exists in the directory by deleting it first.
- -R (recursive): It is used to copy the entire directory by recursively traversing all the directory contents and copying them in the target location.
- -u (update): It performs the copy operation only if there are some changes in the source directory compared to the destination directory.
1. -i(interactive)
Interactive copying is denoted by the letter i . User is warned before he overwrites the file present at the destination while copying with this option. When cp asks for a response, pressing y overwrites the file, but pressing any other choice leaves it uncopied.
$ cp -i demo1.txt demo2.txt

cp: overwrite 'demo2.txt'? y
2. -b(backup)
The cp command generates a backup of the target file in the same folder with a different name and format when this option is used.
$ ls

demo1.txt demo2.txt

$ cp -b demo1.txt demo2.txt

$ ls

demo1.txt demo2.txt demo2.txt~
3. -f(force)
If the system is unable to open the destination file for writing because the user does not have writing permission for the file, the -f option with the cp command causes the destination file to be deleted first, followed by the copying of content from the source to the destination file.
$ cp -f demo1.txt demo2.txt
4. -r or -R
This command copies the directory structure. With this option, the cp command demonstrates its recursive behavior by recursively copying the complete directory structure.
$ cp -r [source directory] [destination directory]
5. -p(preserve)
The -p option preserves the following attributes of each source file in the corresponding destination file: the time of the last data change and access, the ownership (only if it has permissions to do so), and the file permission-bits.
$ cp -p <filename> <destination directory>
6. -l(link)
Option l can be used to make a hard link of a file rather than copying it.
cp -l <filename> <destination directory>
Using the cp command in Linux, we can:
- Copy a file to a new directory.
- Create copies of multiple files in a directory.
- Copy an entire directory.
Let's know each one by one.
1. Copy a File to a New Directory Using the cp Command in Linux
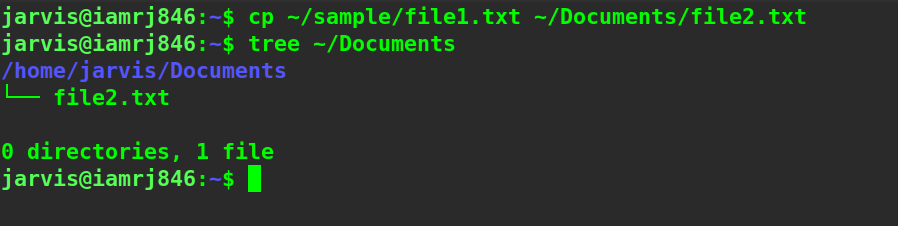
You can use the cp command, the source file name, and the target directory path to copy that file to that target directory in Linux. Please note that you don’t need to give another name to the destination file until a file with the same name already exists in the destination directory. Consider the example of the cp command below:
$ cp ~/sample/file1.txt ~/Documents/file2.txt
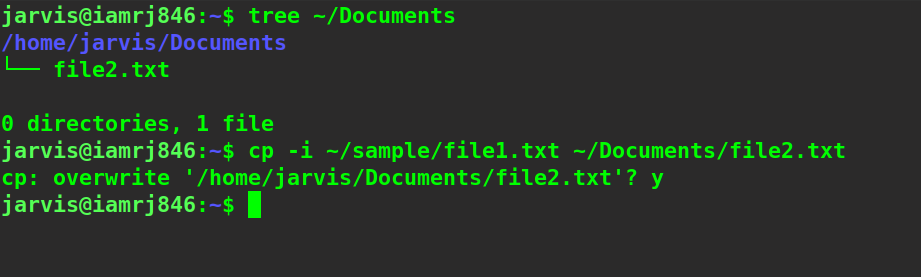
We can also use the interactive mode by specifying the -i flag along with the cp command. It will prompt you every time you try to copy a new file or directory.
$ cp -i ~/sample/file1.txt ~/Documents/file2.txt
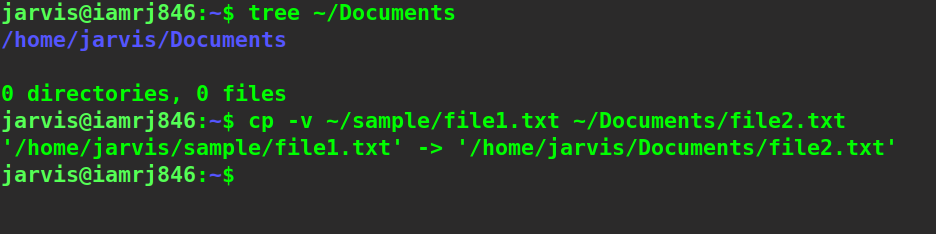
To display detailed information about the whole copying process, we can use the verbose (
-v
) option.
2. Copying Multiple Files to a Directory
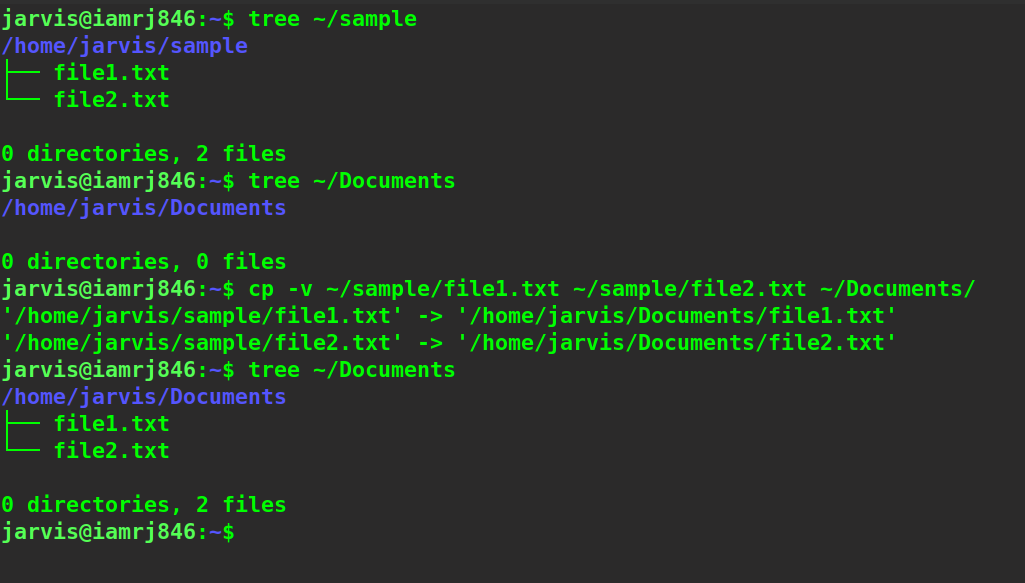
You can copy multiple files from a source directory to a target directory by specifying all the files separated by spaces followed by the destination directory path. For example:
$ cp ~/sample/file1.txt ~/sample/file2.txt ~/Documents/
Now, let’s use the update (-u) option to copy only those files that do not exist in the destination directory.
cp -vu ~/sample/file1.txt ~/sample/file2.txt ~/Documents/
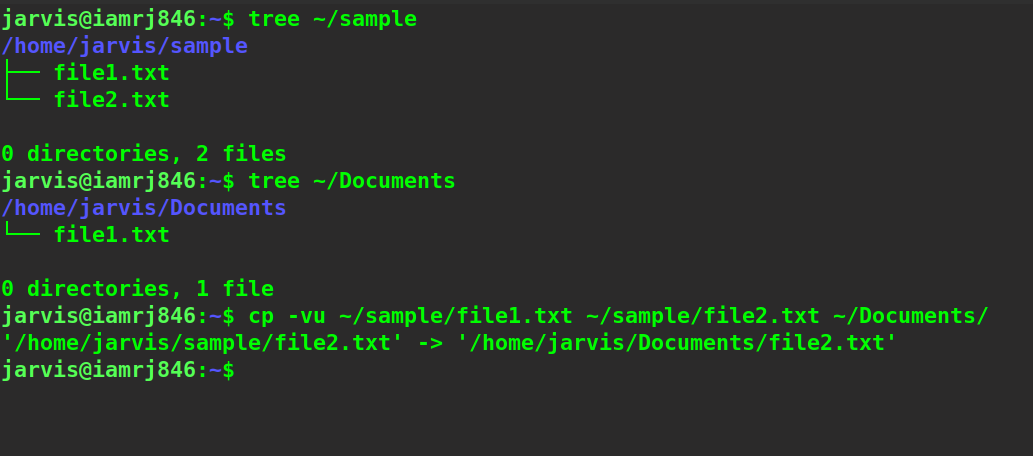
You can see that although we mentioned both file1 and file2 as source files, only file2 has been copied because file1 already exists in the destination directory.
3. Copy an Entire Directory Using the cp Command in Linux
To copy an entire directory to another directory in Linux, you need to use the recursive (-R) option along with the cp command. This option tells the command to recursively backtrack to the parent directory after each file or sub-directory has been copied to search for the remaining files. It will terminate once it has copied all the files.
$ cp -R ~/sample/ ~/Documents/
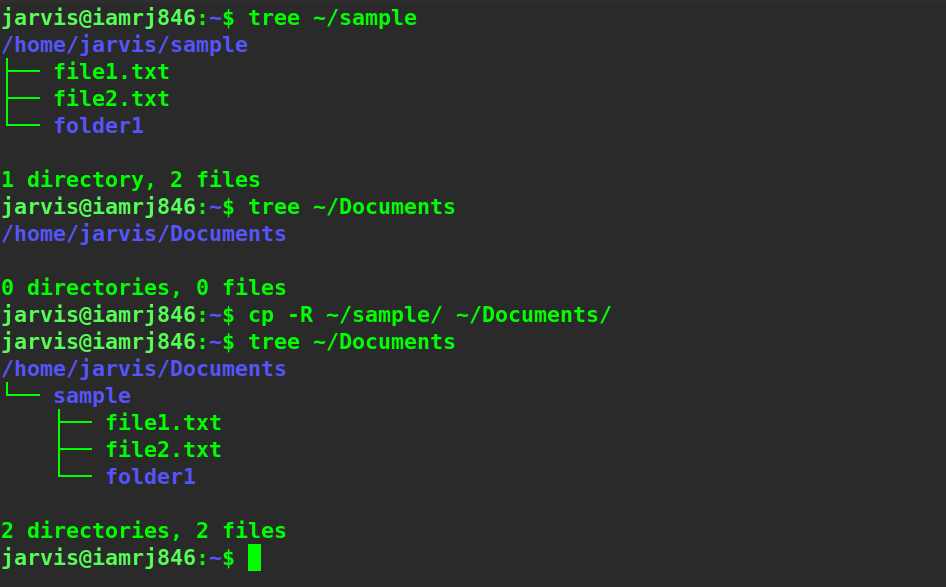
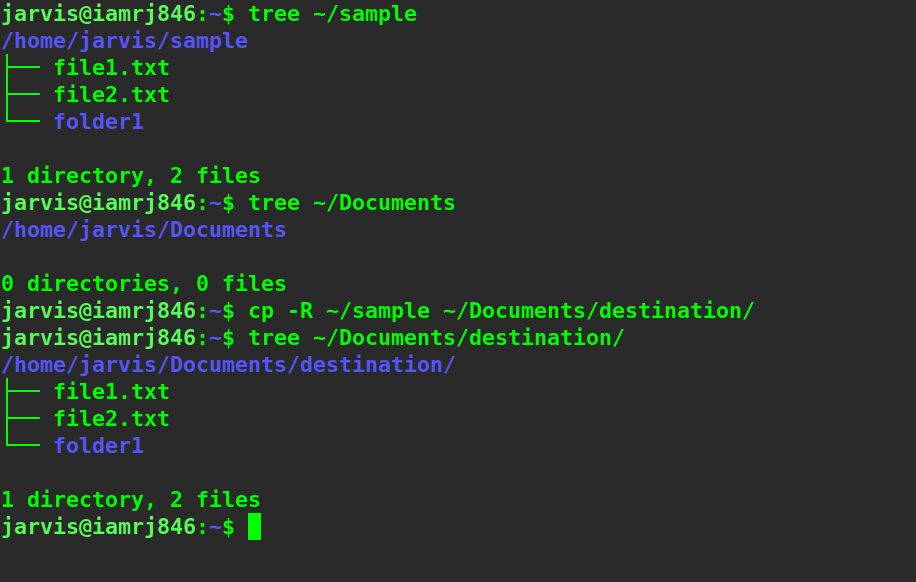
Please note that when you specify the paths in either the source or target directories, the trailing slashes matter greatly. In the above example, we had trailing slashes appended in the source path and the target path. It creates an exact copy of the source directory as a sub-directory inside the destination directory. If we don’t use a trailing slash in the source directory, it will not create a copy of the same directory as a sub-directory but copy all the contents inside the new directory.
Wrapping Up!
In this comprehensive guide, we discussed how we could leverage the cp command in Linux to copy contents and data such as folders, directories, files, etc., from the source path to the target location. We discussed the syntax of the cp command and several options that can be used with this command, such as - preserve, interactive, verbose, force, recursive, and update . Next, we discussed how to copy a single file from one directory to another, followed by copying multiple files altogether to another directory. We also discussed the same command using the verbose, interactive, and update options. We then used the recursive option to copy a complete directory from one location to another. Also, we discussed the importance of trailing slashes by comparing the outputs in two different scenarios. We certainly hope that using this step-by-step guide to the Linux cp command will allow you to copy directories, files, and data via the Linux terminal.
People are also reading:
- SED command in Linux
- Check disk space using DF command in Linux
- 10 Best Online Linux Terminals
- How to use the AWK command in Linux?
- Remove files and directories using Linux Command Line
- How to Extend Linux Partitions with Resize2fs?
- How to Install Kali Linux?
- PING Command in Linux
- pwd Command in Linux
- How to Learn Linux?