
Building a robot may seem tough, yet nowadays, it’s not just for experts anymore. If you're into gadgets, learning in school, or simply curious, making one yourself can teach you how parts move and circuits work while letting you play with code along the way.
A robot's a device you can program to do jobs on its own, sometimes guided by commands, other times relying on sensors plus decision-making smarts. Starting from basic rolling gadgets up to advanced lifelike models, the field mixes physical build and wiring systems along with code to make devices move and act.
In this easy walkthrough for newbies, you'll discover precisely how to create a robot from nothing, which stuff works best, and also how coding it goes, plus testing steps: zero PhD needed.
Understanding Basic Robotics Concepts
Jumping right into construction? First off, get how robots actually operate.
Types of Robots
Robots look all sorts of ways, some tall, others tiny, shaped by what they need to do; one type might roll around while another uses arms or legs depending on its job
- Wheeled robots: Usually the first thing new folks try, they roll around on wheels or treads instead of walking.
- Robotic arms: built to grab things, set them down, or put pieces together.
- Walking robots move using limbs, which are tougher to design because they mimic how animals step.
- Drones, or flying bots, move by spinning blades or rotating wings.
- Humanoid robots are built to copy how people move or act.
Core Components of a Robot
Involves basic parts:
- Sensors notice shifts around them, say, brightness, how far things are, or noises, using small parts that react when something changes nearby.
- Actuators or motors turn power into movement.
- A microcontroller or CPU acts like a brain; it takes info from sensors, then decides what to do next using logic.
- Power source, most often batteries or plugged straight into an outlet.
- The main part is what keeps all the pieces connected.
Figuring out how they connect matters if you want to build a robot that actually works.
Tools and Materials You’ll Need
You don't have to spend a lot on lab gear just to make your first robot; plenty of starter builds work with cheap stuff you can find anywhere.
Essential Hardware
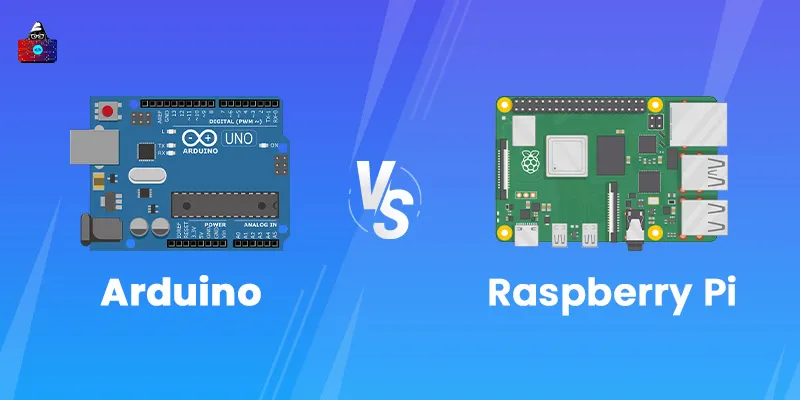
- Microcontroller board (Arduino Uno or Raspberry Pi)
- DC motors or else servo types
- Wheels and chassis/frame
- Sensors like ultrasonic, also infrared, or maybe light
- Motor driver (L293D or L298N)
- Breadboard plus cables
- Battery set plus a toggle
- Screws with nuts beside a screwdriver
Essential Software
- Arduino IDE (for Arduino-based robots)
- Python or Scratch (for Raspberry Pi)
- Simulation tools such as Tinkercad let you try out circuits in a digital space
Budget-Friendly Options
If you're just starting out, go for a robot kit that's got all the bits: frame, motors, and brain box, plus working examples. A few well-liked starter sets include
- Elegoo Smart Robot Car Kit
- SunFounder Robotics Kit
- Makeblock mBot
Steps to Build a Robot
Creating a robot takes five key steps: first comes design, then putting parts together, followed by connecting wires, after that coding the system, and finally checking how it works.
Take a look at every part one by one.
Designing Your Robot
Each big idea kicks off with some thinking ahead. Instead of jumping into circuits or programming, figure out first what kind of machine you’re aiming to build.
Planning and Sketching
Sketch your robot real quick. Show where things like motors, sensors, wheels, or the controller should sit. That way, you get how they fit together.
Ask yourself:
- Would it roll on wheels or maybe step with legs instead?
- Does it react when sensors pick something up?
- What’s going to run it?
Choosing a Robot Type
Starting out? Try a robot with wheels: it goes back and forth, pivots when told, and reacts to sensors too.
After getting the hang of it, try diving into trickier builds: think mechanical limbs or gadgets that dodge barriers.
Building the Robot Body
The body shapes how your robot looks from the outside. For an early version, try materials like plastic, metal, or maybe even stiff paper.
Assembling the Frame
Begin with putting together the frame: the bottom part. Then mount the motors on each side while making sure the wheels are tightly fastened. Use a swivel wheel in the rear when extra stability matters.
If you got a kit, just go by what’s written in the guide. If not, tiny screws or maybe some sticky tape should hold it steady.
Mounting Motors and Sensors
Hook up the DC or servo motors to the frame, making sure they line up right so things move without hiccups. After that, fix the sensors in place, typically up front or on top, to let them catch obstacles or light changes.
Make sure there's plenty of space so you can fit the control panel along with the power unit without any hassle.
Wiring and Electronics
This is when your robot begins to move on its own.
Connecting Circuits Safely
Hook up everything on a breadboard first; no soldering yet. Check that your power supply fits what the circuit needs, like 5V or maybe 12V instead.
Basic connections:
- Link up the motors to a controller unit using wires.
- Hook up the motor driver to the microcontroller, say, an Arduino, using wires that fit both boards properly.
- Hook up the battery case to the power contacts.
- Hook up sensors to the controller’s input pins using wires or direct links instead.
Using Microcontrollers (Arduino or Raspberry Pi)
- Arduino is great for newbies since it's cheap yet simple to code with its own software.
- Raspberry Pi gives extra processing muscle, so you can run Python when tasks get tricky.
Example:
Hook up a pair of IR sensors to the front of your robot. One spots dark areas, while the other picks up light ones, feeding info straight to the Arduino. That board decides where motors should go by switching their movement left or right.
Programming Your Robot
Programming’s like giving commands to your robot. That way, it turns thoughts into moves.
Basic Coding Concepts
Robots follow instructions thanks to coded rules
- Sensors notice things, say, how far away something is.
- The system picks what to do after checking incoming data, using that info like a guide
- Motors kick in or shut off depending on what's needed.
Example:
int leftMotor1 = 3;
int leftMotor2 = 4;
int rightMotor1 = 5;
int rightMotor2 = 6;

void setup() {
  pinMode(leftMotor1, OUTPUT);
  pinMode(leftMotor2, OUTPUT);
  pinMode(rightMotor1, OUTPUT);
  pinMode(rightMotor2, OUTPUT);
}

void loop() {
  // Move forward
  digitalWrite(leftMotor1, HIGH);
  digitalWrite(leftMotor2, LOW);
  digitalWrite(rightMotor1, HIGH);
  digitalWrite(rightMotor2, LOW);
  delay(2000);

  // Stop
  digitalWrite(leftMotor1, LOW);
  digitalWrite(rightMotor1, LOW);
  delay(1000);

  // Move backward
  digitalWrite(leftMotor1, LOW);
  digitalWrite(leftMotor2, HIGH);
  digitalWrite(rightMotor1, LOW);
  digitalWrite(rightMotor2, HIGH);
  delay(2000);
}
Testing and Troubleshooting
Checking keeps your robot doing what it should.
Common Problems and Fixes
- Robot stuck? Look at the motor links, or maybe the power’s out.
- Sensors acting up? Check how they're wired or what the code's doing.
- Wobbly ride? Check if tires spin evenly while making sure frame parts stay tight.
- Try out each part separately first - then link them together once you’re sure they work on their own.
Improving Performance
When it’s running, fine-tune
- Add improved sensors, like ultrasonic ones, to spot obstacles
- Change how fast the motor runs by tweaking the program settings
- Improve design balance
- A few tiny changes can totally shift how your bot acts.
Adding Advanced Features
After your robot works, toss on some cool tweaks!
Voice Control or Line-Following
- Hook up a Bluetooth piece so you can run your robot from a phone app, no wires needed.
- Or include sensors that detect lines, letting it move along a track on its own.
Integrating AI or Cameras
Try something trickier if you're up for it:
- Grab a Raspberry Pi, and hook it up with a camera add-on.
- Try basic AI tools that spot faces or follow objects around
- Work with tools such as OpenCV in Python to handle image data.
These updates let you shift from basic homemade robots to actual everyday uses, using better tools and different parts that link up smoothly.
Conclusion
Putting together a robot on your own isn’t only a cool thing to do at home; it’s also packed with lessons. You pick up real practice in circuits, moving parts, and programming while figuring out how smart machines tick.
Begin with tiny steps, get familiar with the essentials, and keep trying new things regularly. On every build, your grasp grows stronger while sparking fresh ideas. Honestly, what could come next? That basic machine you made might flip into something way bigger, a real obsession, or maybe a future gig building robots.
Frequently Asked Questions
1. What's the time needed to put together a robot?
A simple starter bot might need 4 up to 10 hours to build, then fine-tune. Tricky builds could stretch into several days or even weeks, since it depends on how they're made and what extras are added.
2. Is it possible to make a robot if you don’t know how to code?
Yep, tools such as Scratch for Robotics or ready-made kits let you build without typing code. But if you pick up some simple programming, say Arduino or Python, you’ll unlock way more options.
3. What's the least expensive bot you can make?
A basic two-wheel robot built with an Arduino might run you just 30 to 50 bucks when you go with budget parts or a beginner set.
4. Can you begin without unique gear?
Not exactly. For starters, just grab stuff like a screwdriver or pliers; maybe toss in a tiny soldering iron if you feel like it; that’ll cover plenty.
5. Do children pick up how to make robots?
Fo sho! Kids from age 10 up dig robotics, especially when they’ve got easy-start sets featuring drag-and-drop programming plus gear that won’t hurt.
6. Where does a robot's energy come from?
Many new robots run on chargeable cells, like Li-ion or AA, to drive their engines along with the control panel. A few high-end models might rely on solar energy instead of a USB connection.