

Minecraft is the most sold game on the planet to date! It was developed by Mojang Studios and is now owned by Microsoft. Today, in this blog, we are going to see how to host a Minecraft server. Minecraft is enjoyed by both adults and kids and is supported by many platforms, including PC, Xbox, and Playstation.
The most fun part of this game is that you can play it with your friends online. For this, you and your friends need to be connected to a common Minecraft world, i.e., a Minecraft server.
There are a lot of free Minecraft servers available online, which are open to the public and can be connected to for playing with random people. But, if you want your own private Minecraft world, which only you and your friends can share, then you will need to set up a Minecraft server on your own.
We will be covering the following things in this how-to host a Minecraft server blog:
- System Requirements.
- How to create a Minecraft server (on Windows, Linux, and macOS)?
- Connecting to a Minecraft server.
System Requirements
There are 2 ways you can play Minecraft:
- Using a Shared server (Running Minecraft and Minecraft server on the same system).
- With a dedicated Server.
1. Shared Minecraft Server
If you are playing on a local network, you can host the server and play Minecraft on the same system. In this case, however, since your system will be doing a lot of work, it should have a good configuration.
Following are the system requirements for a PC, where you can play Minecraft and host the Minecraft server as well:
| Requirements | No. of Players | CPU | RAM | Storage |
| Recommended | 1-4 | Intel i5 – 4th gen or later | 8 GB | At least 1.5 GB for saving and running games (SSD) |
2. Dedicated Minecraft Server
If you want to run a dedicated server for playing Minecraft, you need to fulfill the following requirements:
| Requirements | No. of Players | CPU | RAM | Storage |
| Recommended | 1-4 | Intel i5 – 4th gen or later | 4 GB | At least 512 GB for saving games |
Please note: As the number of players increases, the RAM and CPU requirements will also increase! The above configuration takes into account that you are using a default configuration in server.properties. If you do not know what server.properties is all about, don’t worry, as everything will be clear in the next section, which is about installing and running the Minecraft server.
How to Make a Minecraft Server?
Creating and hosting a Minecraft server is very easy. It requires just a few simple steps. Before creating a Minecraft server, however, we need to meet the following prerequisite:
The Prerequisite
Running a Minecraft server requires you to download the JDK and install it on the system.
Which JDK to use? JDK depends on the Minecraft version that you are using. At the time of creating this blog, the latest version of Minecraft was 1.17. So, for running Minecraft 1.17, we require JDK 16.
Steps to Download and Install JDK
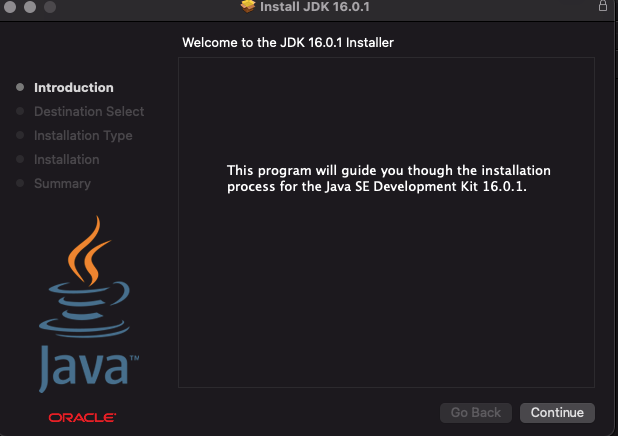
Step 1: Download JDK from the following page. Click on Download JDK 16 or newer to start downloading:

Step 2: Double-click on the file downloaded, and JDK will start installing automatically. Follow the on-screen instructions to install JDK.
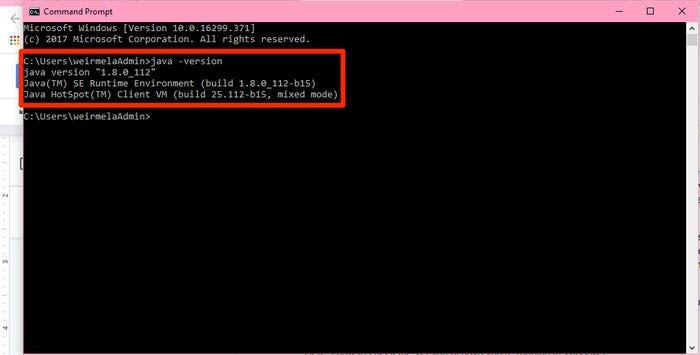
Step 3 : Once JDK is installed, check if Java is installed. For doing so, open the command prompt or terminal, and check Java’s version.
- For Windows, type java -version
- For Linux or macOS, type java --version
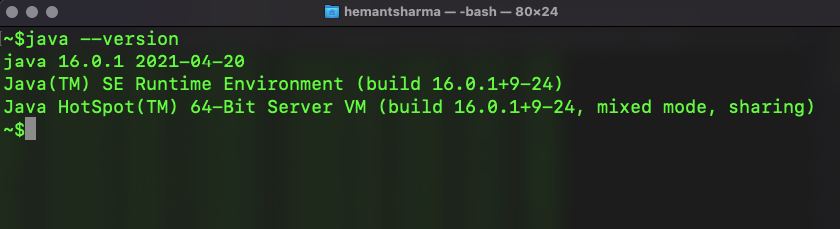
If you see the above message, you have successfully installed Java. However, if you see the “java is not recognized…” message, then this means the path of java is not set. A simple Google search on this will help you understand how to set the path of java in any OS. Now we are ready to create a Minecraft server.
Downloading the Minecraft Server
Step 1: Go to minecraft.net and download the Minecraft server . In this blog, we will be installing Minecraft server 1.17.
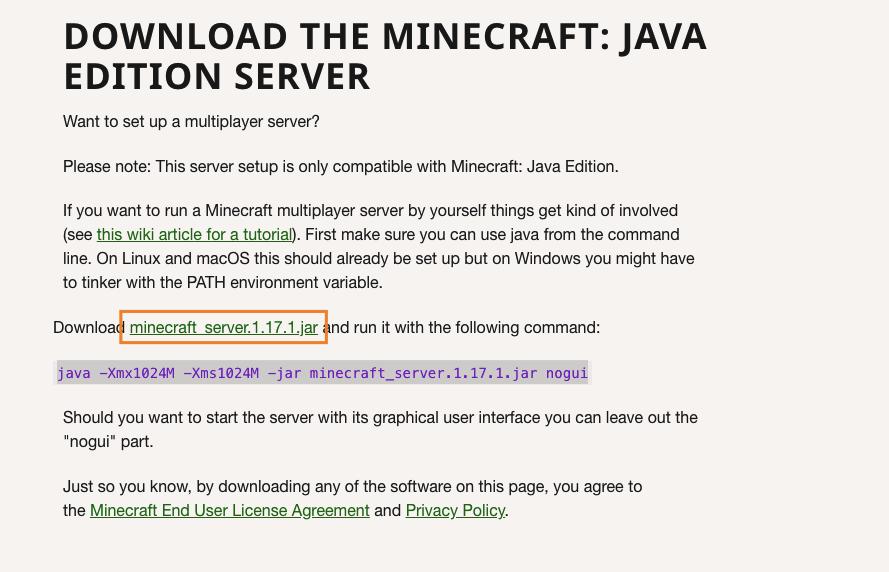
Click the download link, as shown in the screenshot, and the Minecraft server will start downloading.
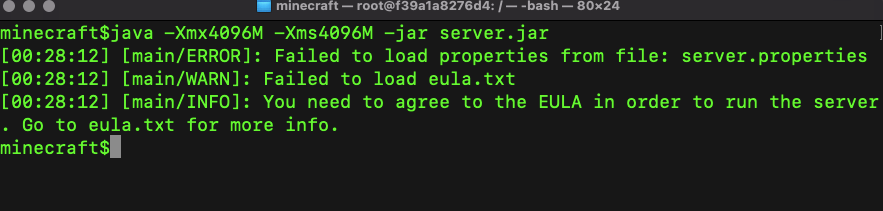
Step 2: Next, open the command prompt or terminal and navigate to the folder where the Minecraft server’s jar file has been downloaded. Once in the folder, run the following command: java -Xmx1024M -Xms1024M -jar <file-name>.jar nogui. Replace the <file-name> field in the above command with the jar file’s name that you downloaded.
Please Note: In the above command, the number 1024 signifies 1 GB of RAM, which will be allocated to your Minecraft server. If you want to increase the RAM, put values in multiples of 1024, such as 2048 (i.e., 2GB) or 3072 (i.e., 3GB). Remember, this number should not exceed your maximum RAM size.
Step 3: The first time you run the Minecraft server, you will notice the following error: Do not worry, this is usual. In the next step, we’ll show you how to resolve this.
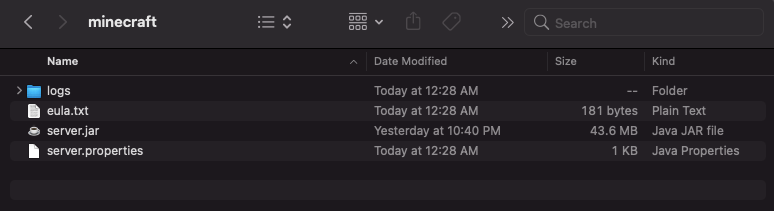
Step 4: Open the folder that has the jar file. You will notice some new files are created. This is how your folder will look:
Now, we have to edit the eula.txt file. So, open it in a text editor and edit the following values:
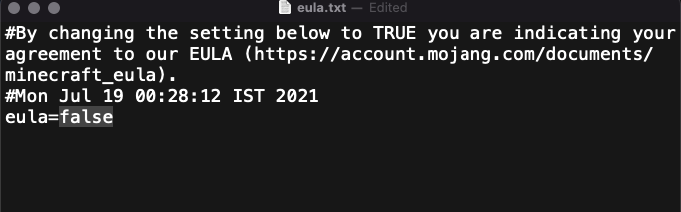
Change the value from false from the above screenshot to true as shown in the following screenshot:
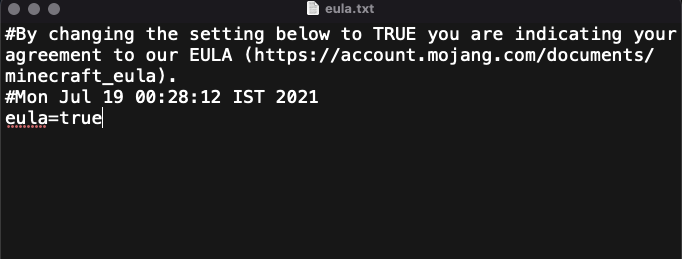
Now save the text file and close it. Let’s try running the Minecraft server again in the next step.
Step 5: Let’s again run the Minecraft server, using the same command:
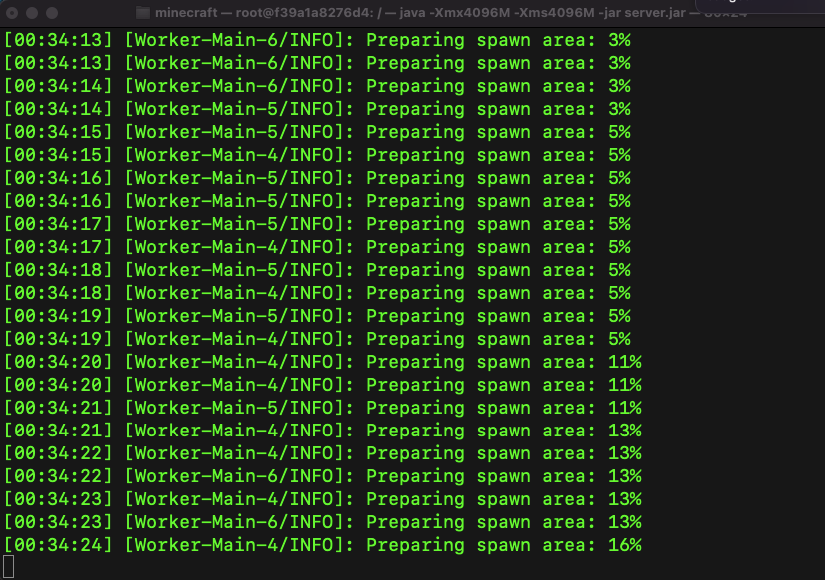
Now, the server is starting up, and you will see updates, as shown above. Once the server is ready, you will see a message as shown below:
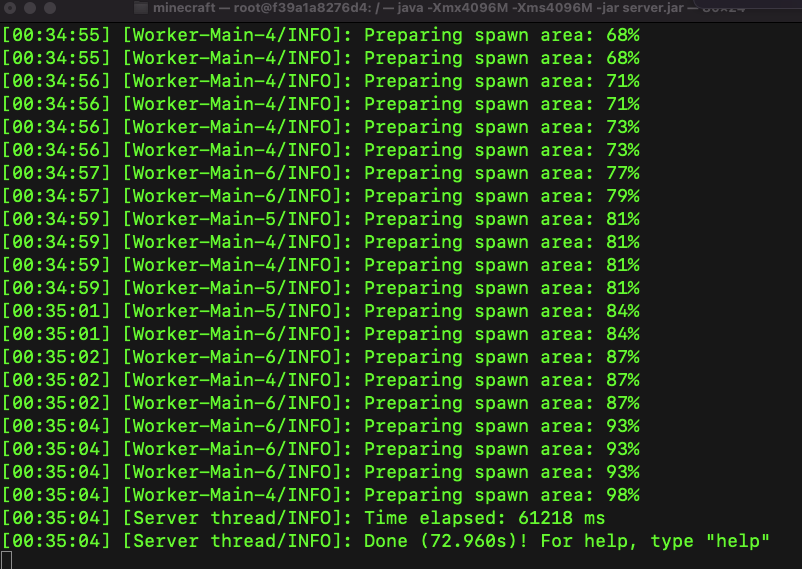
Congratulations! You have successfully set up your Minecraft server. The next step is connecting to this Minecraft server. Let’s see how we can do that.
Connecting to a Minecraft Server
Minecraft can be played with your friends in two ways. You can either:
1. Play Minecraft on a local network
Or
2. Play Minecraft on the Internet.
1. Play Minecraft On a Local Network
If you want to play Minecraft on a local network, you have to first connect to the same network as the system where you are running the Minecraft server. This can happen either by connecting to the same wifi or connecting a LAN cable to the same network. Once all the players are on the same network, go to the Minecraft server and open another command prompt window:
Note: Remember, do not close the terminal or command prompt window running the Minecraft server, as this will exit the Minecraft server.
Step 1 - Find out the Local IP of your Minecraft server
To find the IP address, in the new command prompt or terminal window, run the:
- ipconfig command, if you are using Windows, or
- ifconfig command, if you are running macOS or Linux.
Windows:
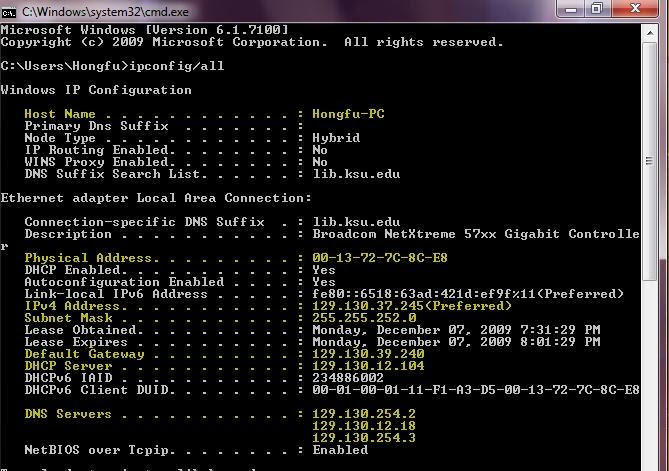
Note the IPV4 address from the above. In the above case, it’s 129.130.37.245. This is your local IP address.
Linux or macOS: Running the ifconfig command will show the following output:
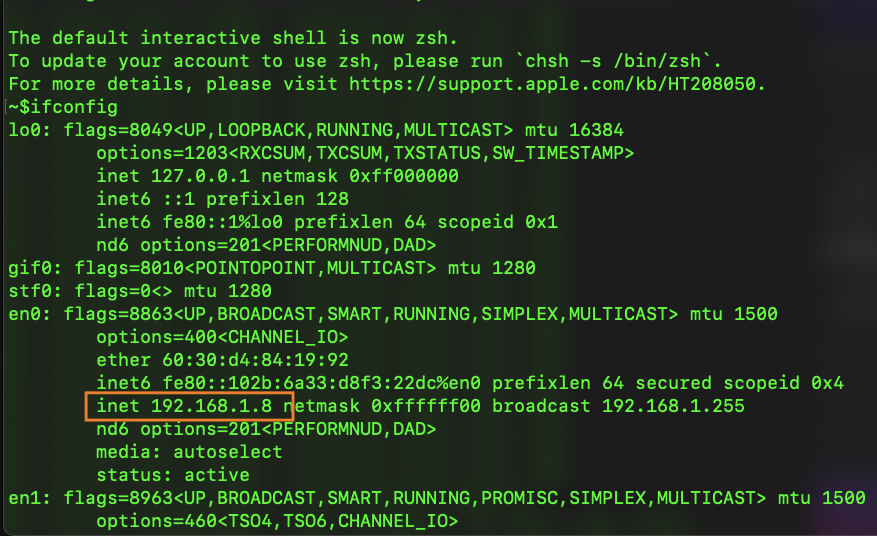
Take note of the “inet” IP address value. This is your local IP address.
Step 2 - Joining a Minecraft server
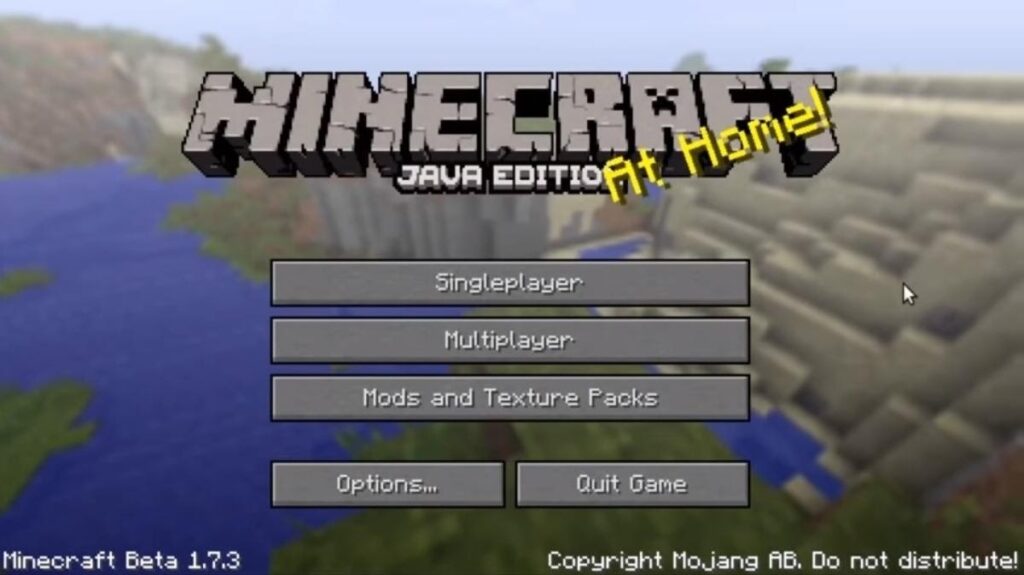
In this step, you will have to ask your friends to open Minecraft and click on Multiplayer:
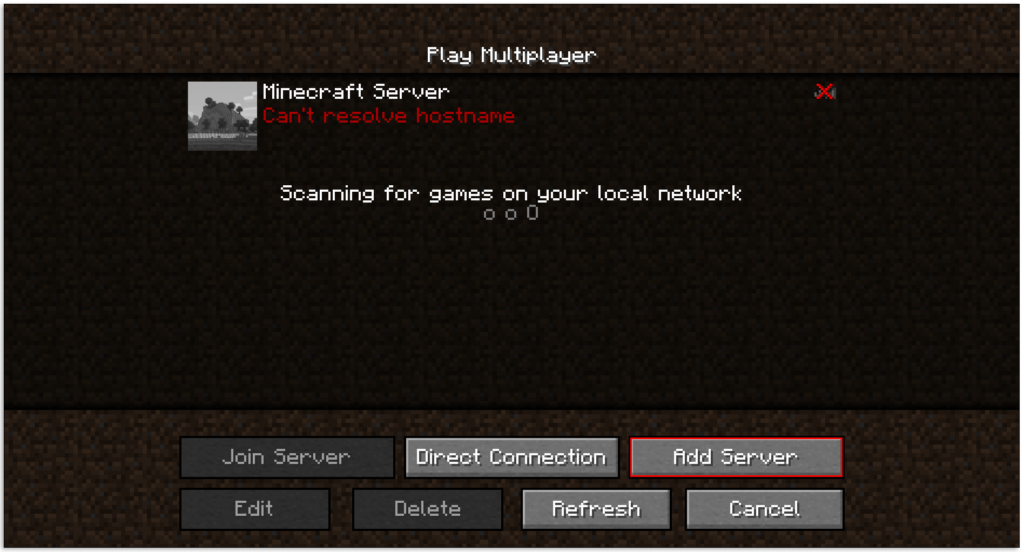
Once inside Multiplayer, they will have to click on Add server:
Now enter the Local IP address of the Minecraft server along with a name for the server. The name can be anything, which can help you identify the server.
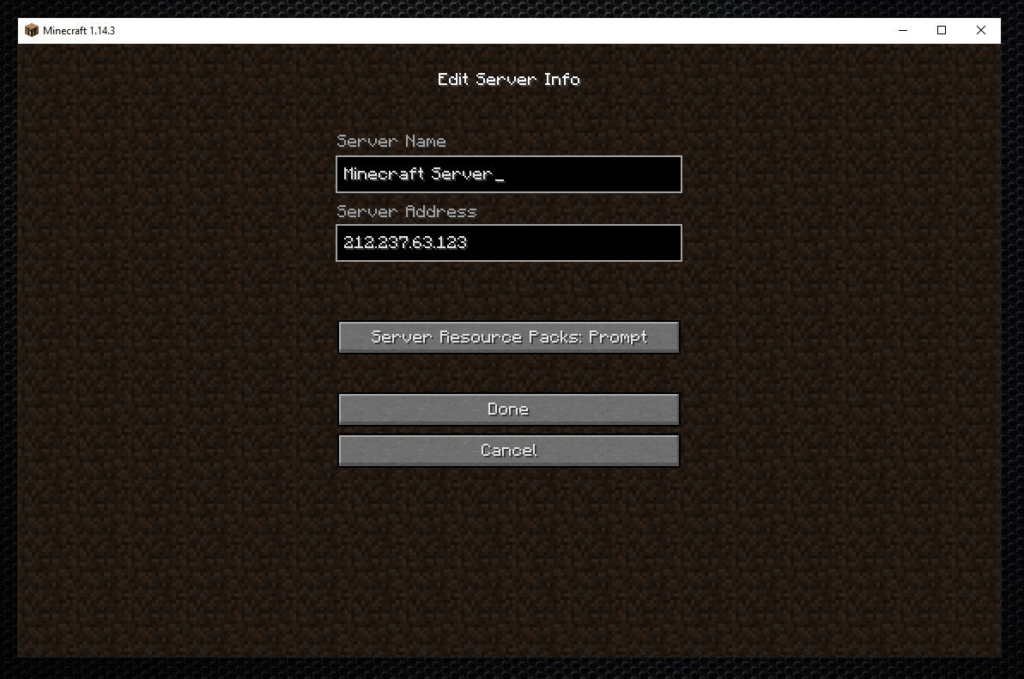
Finally, click on Done. You have successfully added the server. Now click on Join Server, by selecting your server from the list as shown below:
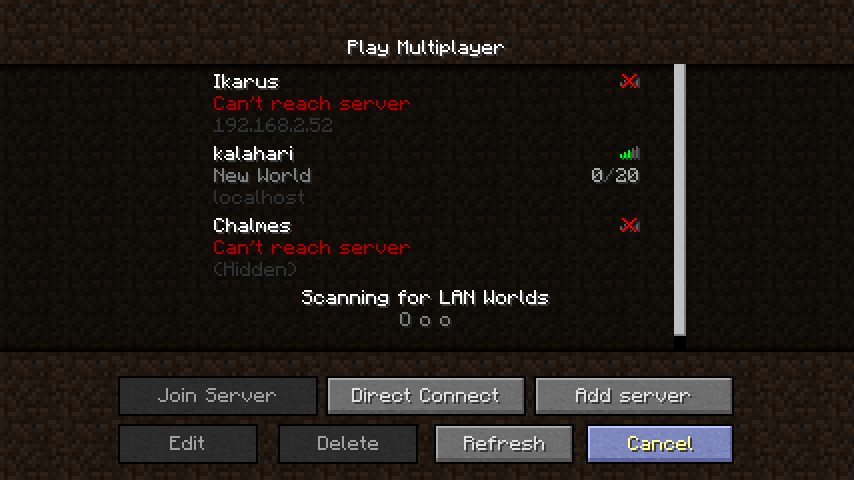
In reference to the above screenshot, click Kalahari, and click on Join Server.
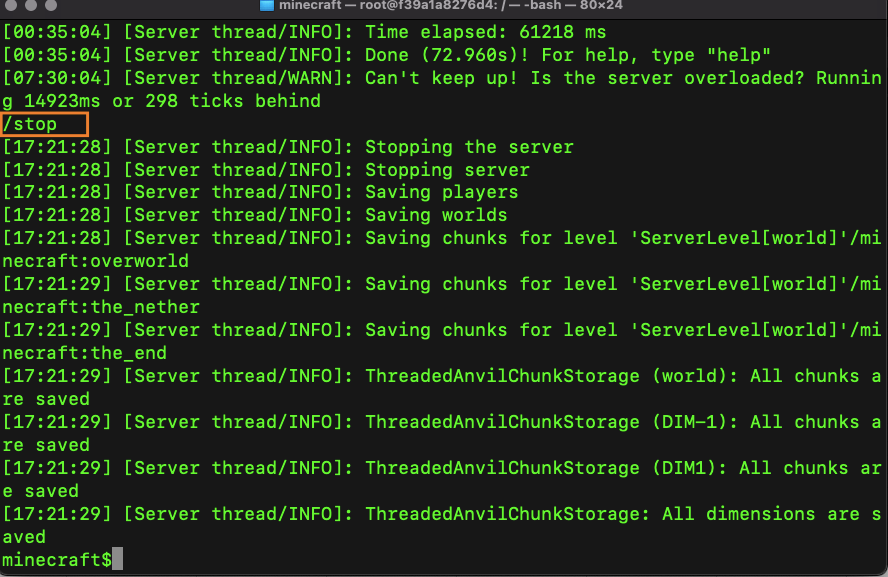
How to Safely Stop a Minecraft Server?
Open the command prompt/terminal of your Minecraft server, and type “/stop” to stop your Minecraft server.
2. Play Minecraft on the Internet
If your friends are not on the local network, and you want to play Minecraft with them, you can do so by hosting a Minecraft server on the internet. This requires some advanced skills, where you will have to change some settings in the router.
We will be setting “port forwarding” in the router to allow connections from outside to reach the Minecraft server on a certain port. For this, we need to tweak the firewall settings of the Wifi router. Every router is different. Hence the way to do port forwarding will also be different. I will show you today how to do port forwarding on Beetel 777vr1.
Setting up Port Forwarding
Step 1: First you need to find out the default gateway’s IP of your network. It is very easy, but the method is different for Windows, Linux, and macOS.
Windows:
Open the command prompt and type “ipconfig”
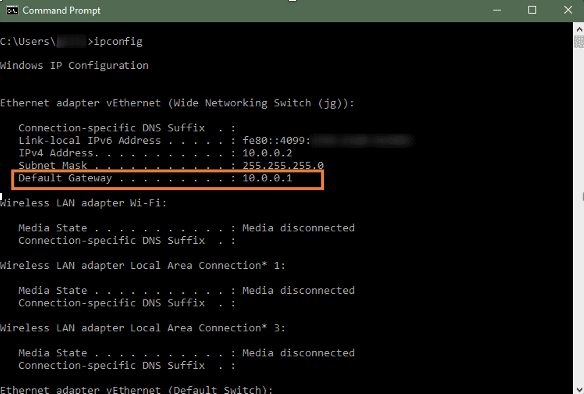
The highlighted IP address is your default gateway IP address.
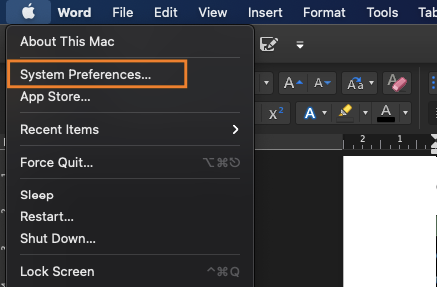
macOS:
For macOS users, click on the Apple logo on the top-left of your screen, and then click on System Preferences.
In system preferences, click on Network:
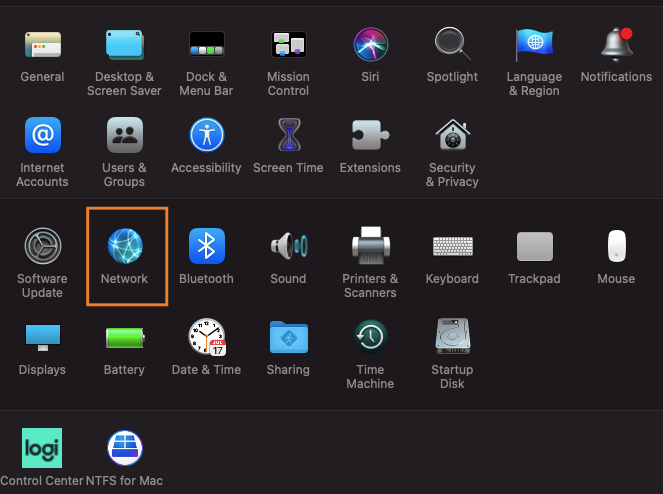
In Network, click on Advanced, under Wifi:
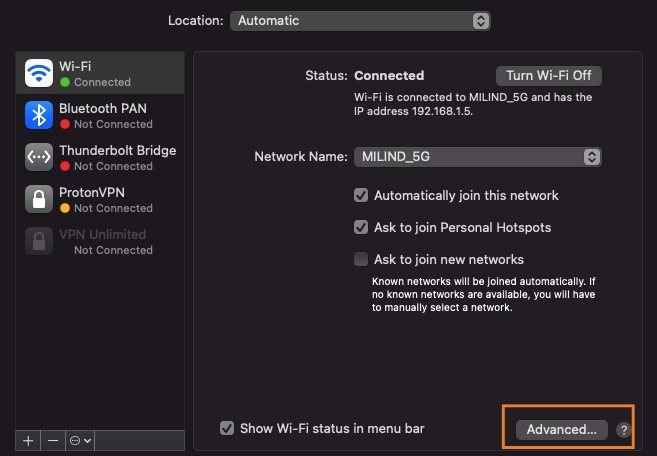
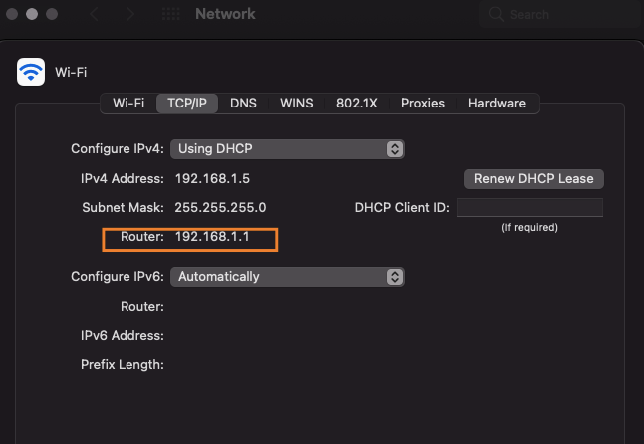
In Network, click on TCP/IP, and here you will find your Default Gateway IP address as Router:
Linux:
In Linux, type “netstat -rn”
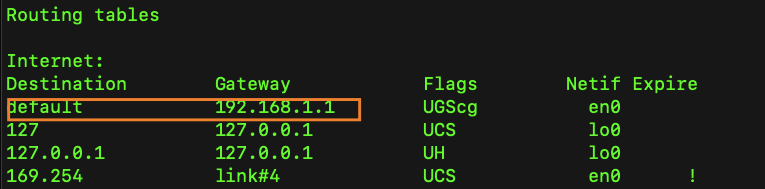
This will give you the default gateway address.
Step 2: Enter the default gateway IP address in your browser as shown below:
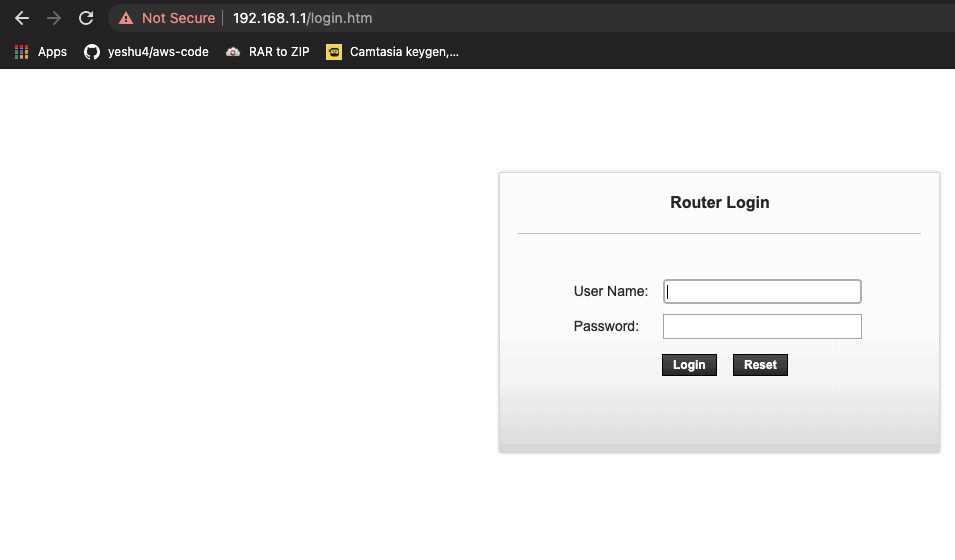
It will ask for a login. If you have not set this up previously, then you can find the default username and password for your router on the internet. In our case, it’s admin, and the password is also admin. Click on Login after this.
Step 3 : After logging in, you will see a screen like this:
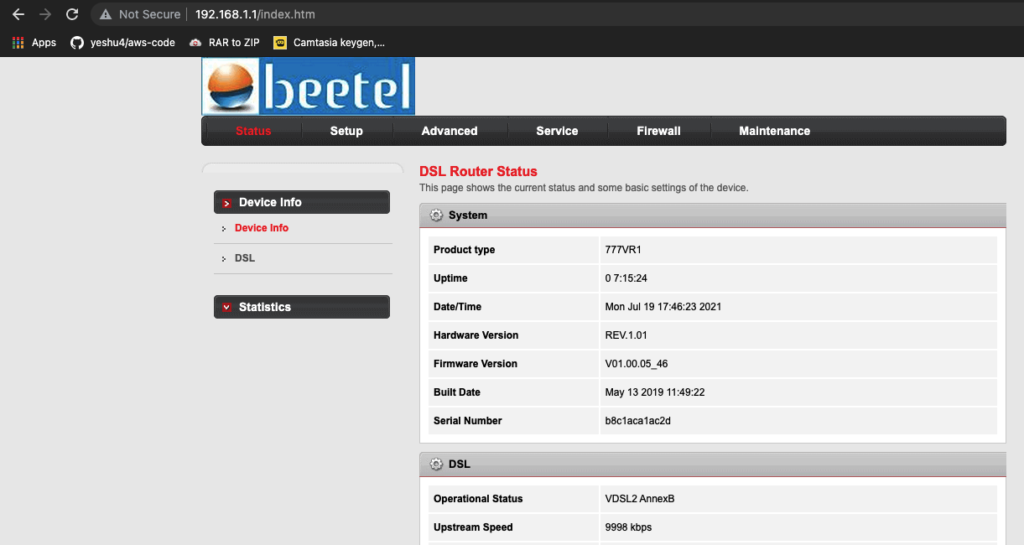
Go to Advanced > NAT > Virtual Server.
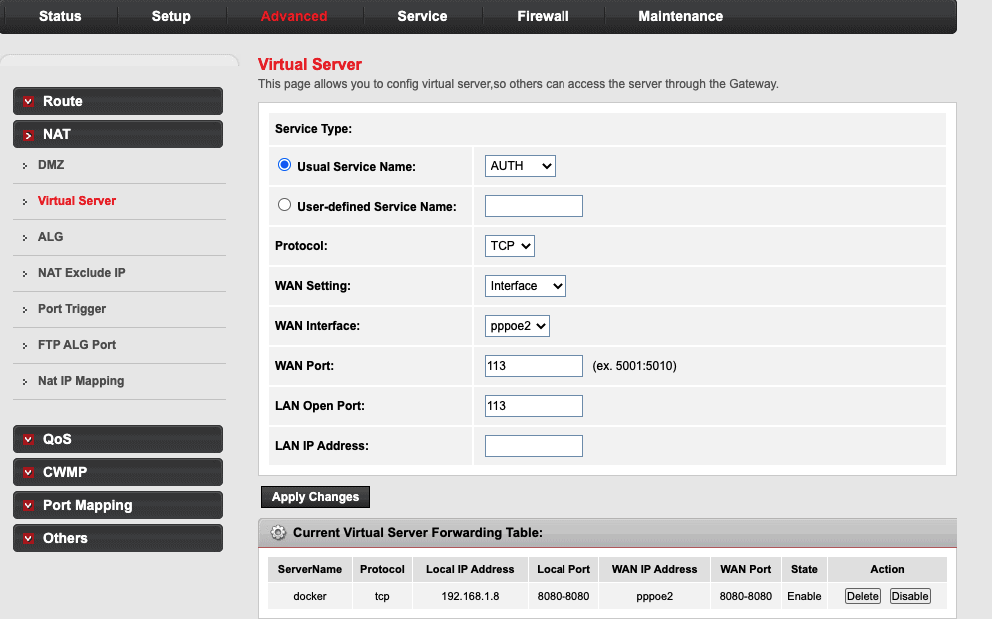
Note: The user interface will be different for every router model. Please search for “how to do port forwarding <router model>“ on the internet to find out the correct method in your case.
Step 4: Minecraft server works on 25565 port number. We need to open this port for the Minecraft server on the router. First, name your rule by clicking on “User-defined Service Name” and name this rule Minecraft. In the LAN IP address, mention the local IP address of the Minecraft server. In LAN Open Port, mention 25565. In the WAN port, mention 25565. Finally, click on Apply Changes.
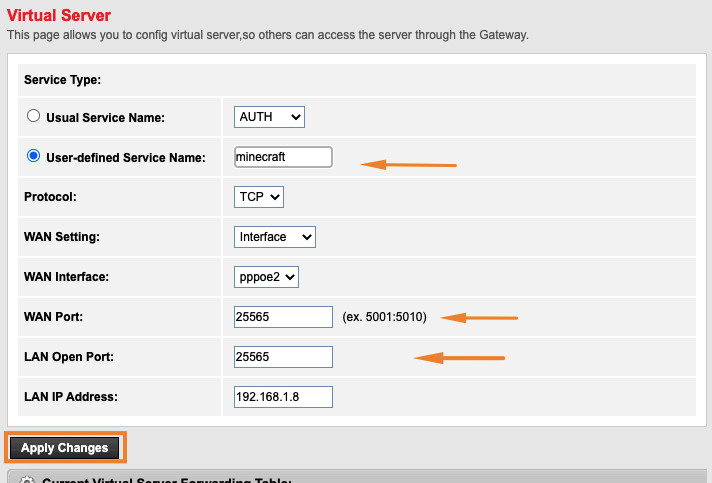
And that’s it; your Minecraft server is now available on the internet.
Step 5 : You need to find your public IP address. To do so, head over to YouGetSignal and enter port number 25565. Next, click on check to see if the changes have taken place.
NOTE: You have to start the Minecraft server first before checking whether the port is open or not.
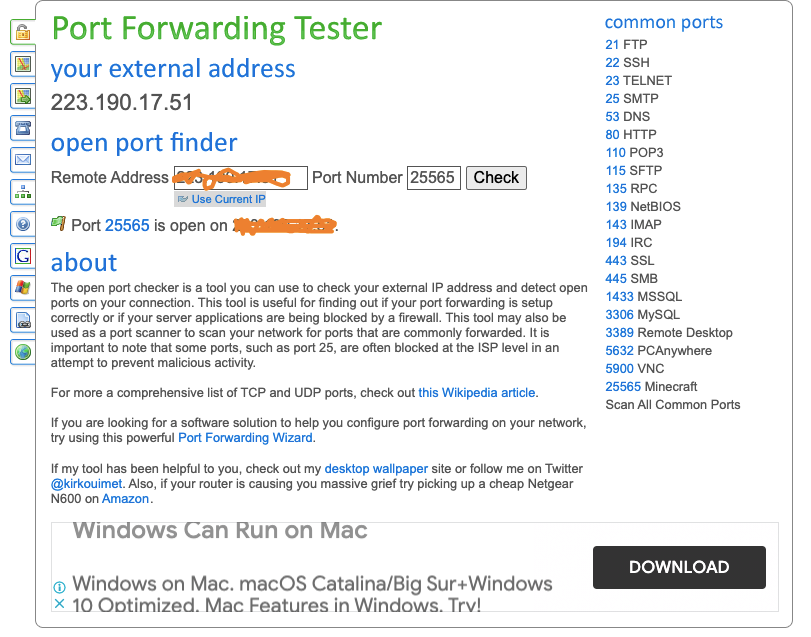
The IP address has been blurred in the above image for privacy reasons. This is the IP address that you will give to your friends, and they have to enter this after clicking on Join Server.
Conclusion
And that’s it, guys! We hope you have enjoyed reading this blog as much as we did to research and brought this blog to you. Now, you don’t need to look anywhere else to know how to create a server on Minecraft. Head over to our comments section and let us know what you think about the article.
Until next time.
People are also reading:
Leave a Comment on this Post