
What is a mail merge?
Mail merge is a process that combines mails, letters, envelopes, labels etc. for mass mailings from a form letter. It contains fixed text and variables. Using mail merge, you can send the same information to many recipients at the same time, thus avoiding the rework. One can also customize the content for individual letters. Mail merge feature is available from MS word 2003 and works in the same way for 2007, 2010, 2013 and 2016 as well. For the 2003 version, the menu item is ‘Letters and Mailings’, whereas, for newer versions, it is under the ‘Start Mail Merge’ tab.
The six steps in Microsoft Word Mail Merge
Mail merge consists of 6 simple steps:
- Select the document type: Letters, envelopes, labels, etc.
- Start the document: choosing an existing document, using the current one, etc.
- Select the recipients: from a data source, outlook contacts, existing list, etc.
- Write your letter: customize the letter for each or all the recipients
- Preview your letters: Preview how your letter looks like, change individual letters
- Complete the merge: complete and print the letters, edit individual letters
How to use mail merge in Microsoft Word?
It is easy! Just follow the instructions in this article and on your MS word screen, and you should be good to go!
Step 1
Double click to on MS word icon to open a word document

Step 2
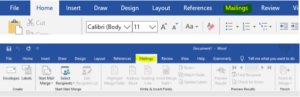
Switch from Home to the 8th menu, i.e. Mailings:
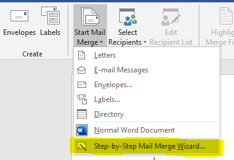
Step 3
In the Mailings group, click on Start Mail Merge:
 You are presented with the above options.
Step 4
You can choose the option that you want: Letters, Email Messages, Envelopes, Labels, Directory, etc.… For this article, we will choose the Step-by-Step Mail Merge Wizard option (which will eventually lead us to one of the above options only):
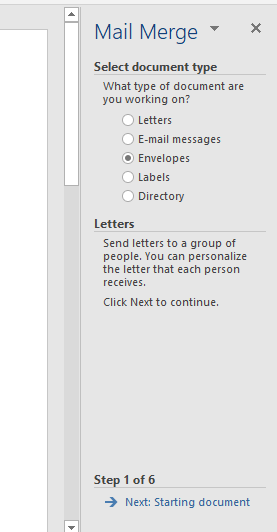
Step 5
Upon clicking the above, we are shown the same options once more, for this article, let us choose “Letters”:
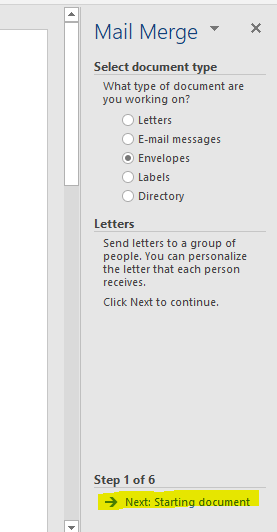
 You can choose the option you want and select Next: Starting document link at the bottom right of the screen:
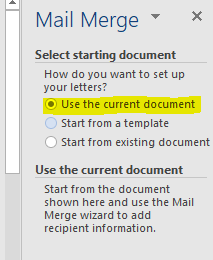
Step 6
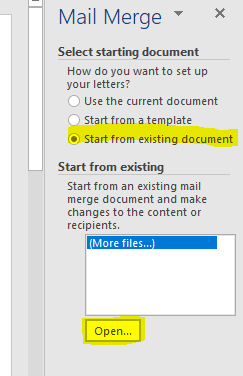
In this step, you can choose the document from the options given. There are three options. You can choose the current (open) document:
 The second option is to start from a template in which MS word asks us to select a template from the available ones. Click on the “Select template…” This will open a dialog box with multiple options:
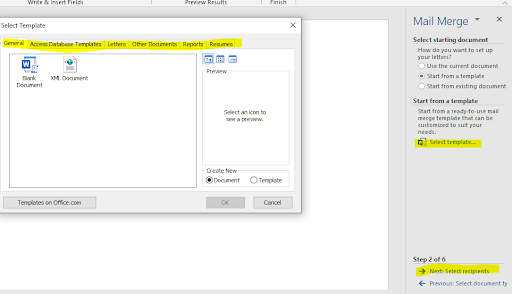
You can choose General, Access Database Templates, Letters, Reports etc. You can select any and click on Next: Select recipients. In the third option, you can open an existing document from there itself, using the open button, which opens a dialog box. You can then browse to the required location and select the required file.
 Upon selecting the file, click on the Next: Select recipients’ option.
Step 7
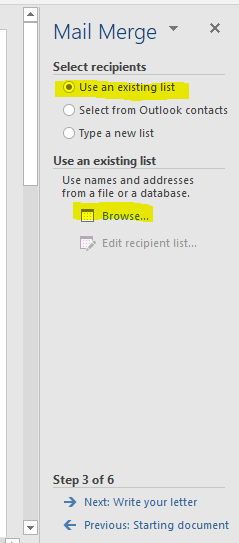
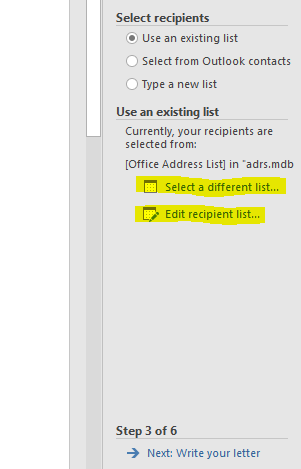
Now, it is time to add the recipients or receivers of the mail. They can be from your contact list or outlook, or you can type a new list. All the options are provided by MS Word:
Step 8
If you have an outlook profile and contacts in that, you can choose the option too. If you wish to create a list, choose the third option “Type a new list” and then click on “Create”. A dialog box will open where you can create a list of required entries:
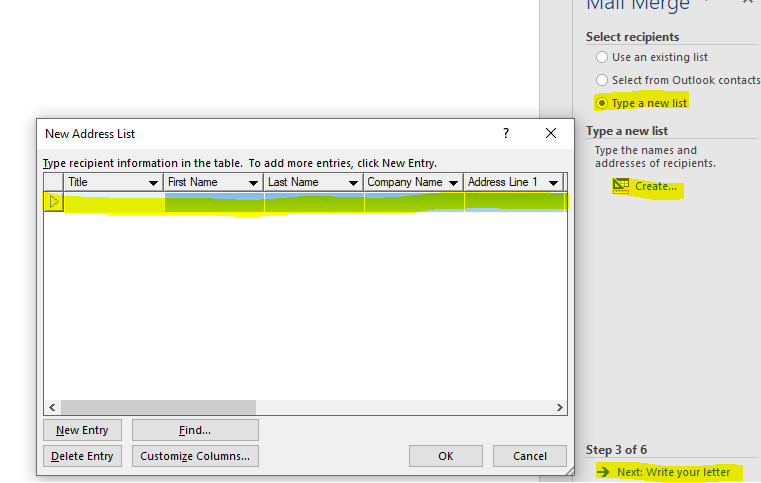 You can save the address list and then edit and add more entries to it later on:
 Word gives you an option to select/unselect individual recipients from the list.
Step 9
Once you select the recipients, click on “Next: Write your letter” to write the content. If you selected a template, or a blank (current) document, or existing, this will be your chance to modify/make any corrections to the letter. Word also gives options to customize your final letter:
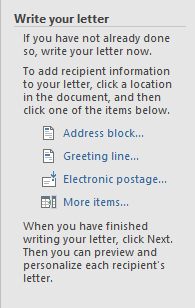 To add an address block, click on “Address block” and a dialog box will open so that you can customize how the address block appears on the letter:
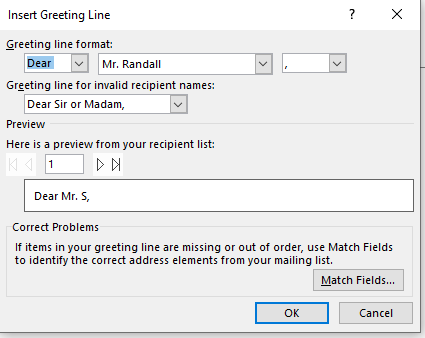
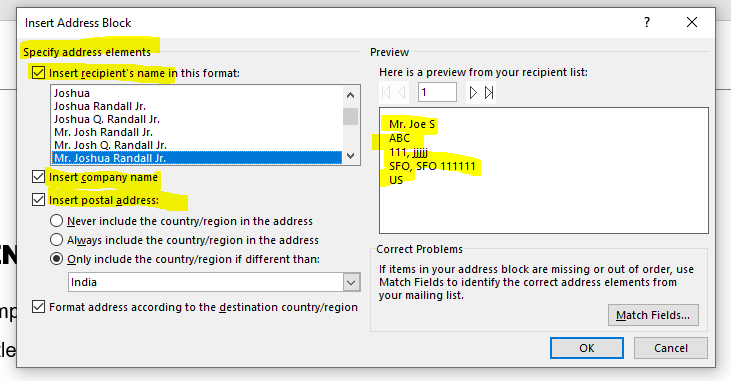 You can select/unselect any items in the options. For example, if you unselect ‘Insert company name’, the ‘ABC’ will disappear in the preview on the right-hand side. You can also add a Greeting line of your choice.
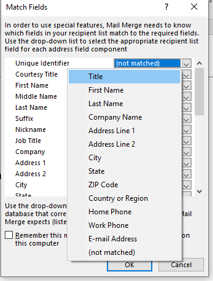
 You can also use ‘Match fields’ to match a particular field and correct errors in displaying the data if any.
Step 10
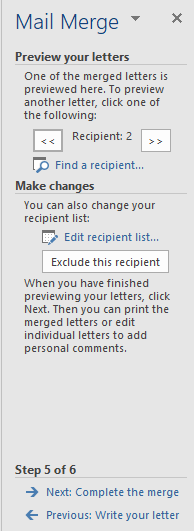
Click on “Next: Preview your letters” to preview letters, edit any of them, customize individual letters, exclude a recipient or even change the recipient list:
Step 11
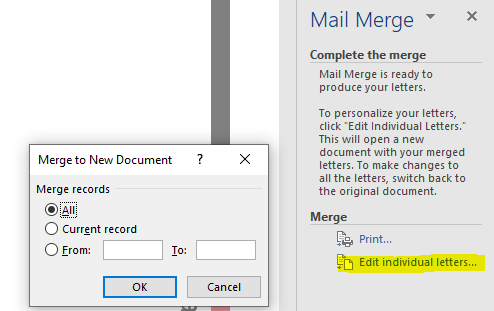
Click on ‘Complete the merge’. This will create the final letters ready to be printed. You can still edit selected letters, by choosing the edit option:
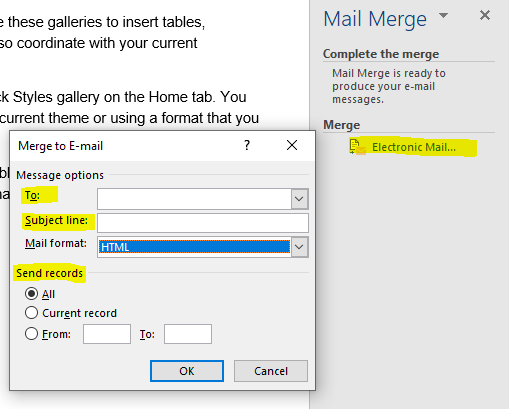
 Before printing, you can once again preview your letters by clicking on “Previous: Preview your letters”. Note that you can go to the previous step at any point in the entire process. The process is the same for all types. For example, for a merge to email, all the steps are the same, and in the last step, you can customize some options for all or some of the emails:
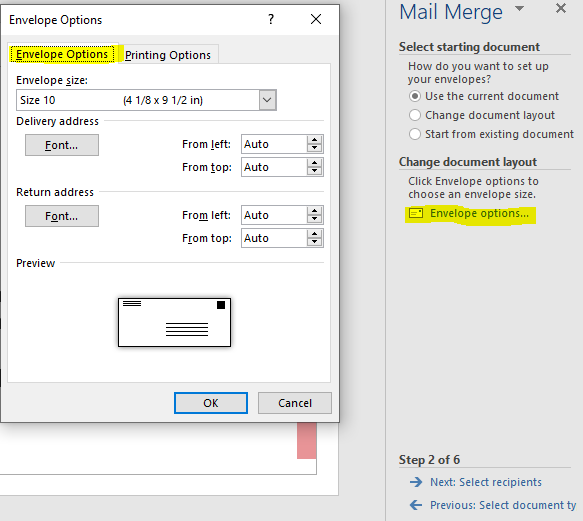
 If you select ‘Envelopes’, everything is the same, except that you get to customize the envelope layout before selecting the recipients:
 For “Labels”, you can change the Label layout:
 For directories, you will get similar options as that of Letters.
Conclusion
It is simple to use the Mail merge, and the instructions are relatively straightforward if you have some experience with MS Word. With the information in this article, you should be able to use mail merge with ease and accuracy. Let us know in comments if there is anything else you would like to know! People are also reading:
- How to Uninstall Chromium?
- How to Allocate More RAM to Minecraft?
- How to find and remove loops in a Linked List?
- How to Block the Chrome Software Reporter Tool?
- How To Make a Game With Python?
- How to Delete Browsing History?
- How to Buy a Domain?
- How to Create a free Apple Developer Account?
- How to Play sounds in Python?
- How to Remove Malware from Mobile Phone?