

Linux allows creating a set of permissions to manage access to files and defines who can read, write, or execute those files. Typically, there are three sets of permissions for a file - for the owner, the group, and the last one for everyone else. For a directory, these sets of permissions define who can move into the directory and modify it. These permissions can be manipulated using the chmod command in Linux by the appropriate user who has permission to do so.
But before we try to understand how the chmod command works in Linux, we need to have a thorough understanding of how the file permissions are given to users.
How to use the CHMOD command in Linux?
File Permissions in Linux
In Linux, we can use the ls command to display the prevailing permissions for a folder, file, or even a directory.
$ ls -lR ~/Documents/
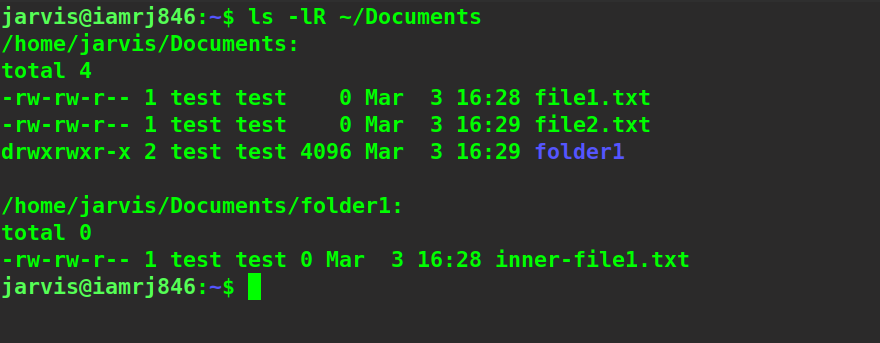
The -R option displays the details for all the files, folders, and sub-directories recursively.
And the -l option is used to display the information related to the contents in a long format.
If you notice the output carefully, the first parameter (-) displays the type of file. Here, - denotes that it is a regular file.
If it’s a d character , it means that it will denote a file type called directory. The next nine characters define the sets of permissions for the three types of users we discussed above. The first three characters denote the set of permissions for the one user who created them. The next three characters, that is, the one in the middle, are for those members who reside in the group that has access to this file, and the last three characters are for the rest of the users, excluding the owner and group members.
For each set, there are three characters. It can be either a - (dash), which means that the character is absent, i.e., the specific permission has not been granted for the corresponding user. If not a dash, it can be r (read), w (write), or x (execute). The executable option holds if the file is executable such as an appimage or shell script. Thus, no permits were granted, and rwx means that the corresponding user or group has full permission. The next two parameters are for username and group name.
Understanding the syntax
If we want to manipulate file permissions using the chmod command in Linux , it’s very important that we carefully understand the syntax. To specify the permission, we need to define the who, what, and which. It means that we need to tell the command for which sets of users we are defining permissions. Are we adding or removing, or modifying existing permissions? If we are setting permission, then which of the following is it - r, w, or x? For the question of who, it can take values such as u (user), g (group), o (others), and a (all). For the question of what, it can take values such as - (removing permissions), + (adding permissions), and = (setting permissions).
Changing the permissions using chmod
Let’s suppose we have a file with full permissions for users, groups, and the rest of everyone else.
$ ls -l ~/Documents/file1.txt

If we want to change the permissions and remove the execute permission for users and keep only read permission for everyone else, including groups, we can use this command.
$ sudo chmod u=rw,og=r ~/Documents/file1.txt
Please note that you must have access to sudo if you want to change the permissions.
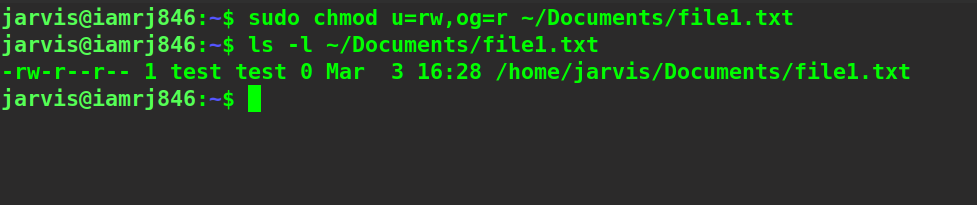
You can see that the permissions have now been modified according to what we specified. Please note that we remove all the existing permissions that the file has and assign new ones to it if we use the equal operator. If we want to add permissions without a wipe-out of the existing ones, we can use the + sign. Suppose we want to add execute permission for all the users.
$ chmod a+x ~/Documents/file1.txt
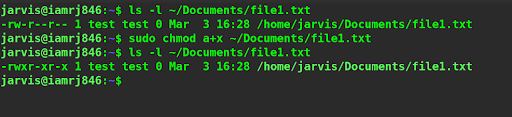
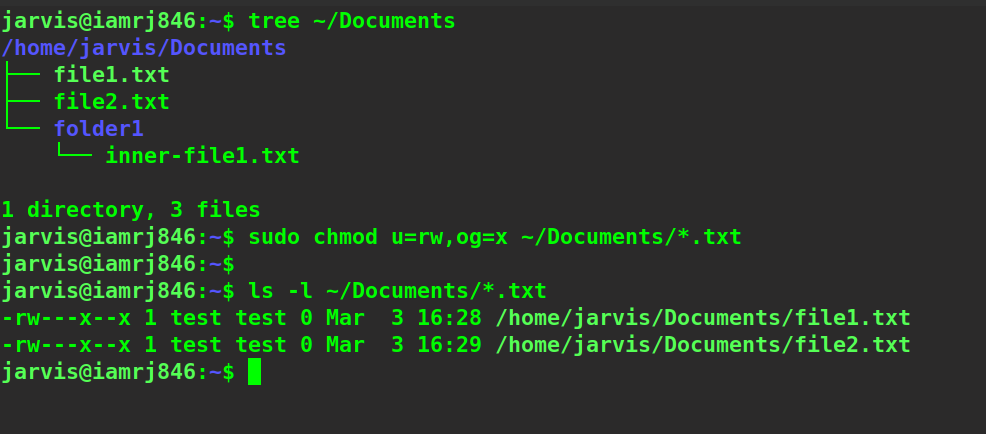
You can see that we now have executed permissions added for everyone. Even if we had not mentioned a character and simply the +x , this would give us the same result. We can also apply permissions for multiple files using the * character. Suppose we want to set read and write permissions for the file user and execute permission for all others for all the text files inside a directory; we can do it as mentioned below.
$ sudo chmod u=rw,og=x ~/Documents/*.txt
Using Numerical Method
We can also use a shorthand to specify permissions to files in Linux. We need to convert the three characters set into a binary number and then convert it to decimal. We can do this for all three sets, and the final result would be a three-digit number. The rule for converting permissions to binary is:
- 0: (000) - There is no permission.
- 1: (001) - It has only the execute permission.
- 2: (010) - It has only write permission.
- 3: (011) - It has both execute and write permissions.
- 4: (100) - It has only read permission.
- 5: (101) - Assigned only execute and read permissions.
- 6: (110) - Only the write and read permissions have been assigned.
- 7: (111) - All permissions.
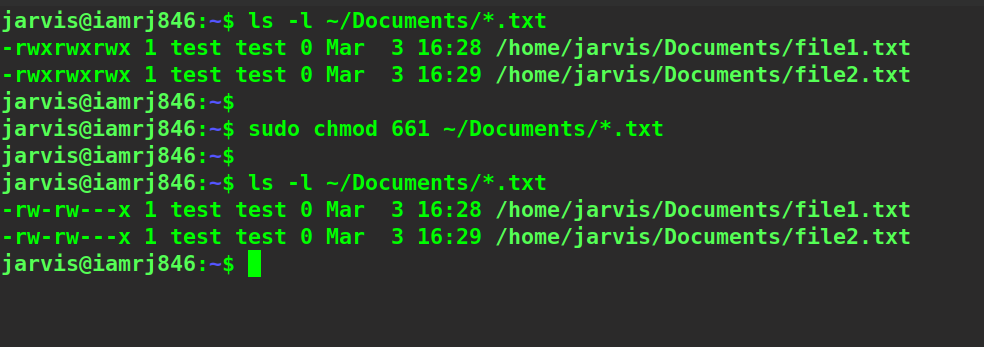
Please note that you must have a basic knowledge of converting binary to decimal. If we want to give read and write permissions to the owner and only execute permission to the group members and all others, our corresponding number will be 611. Let’s try to assign the same.
$ sudo chmod 661 ~/Documents/*.txt
Wrapping Up!
To sum up, in this article, we explained in detail the concept of file permissions in Linux by explaining the format of the permissions for the different types of users and groups. We then discussed the three sets of characters and what they represent, and how the permissions are coded into these sets of characters. Moving ahead, we discussed how to specify permissions using the chmod command in Linux by understanding the what, who, and which concepts and what values they can take.
Finally, we tried to change the permissions of a single file and multiple files by either adding using the + sign or setting new permissions using the = sign. Next, we discussed how the same task could be achieved by coding the sets of permissions into binary values and then converting it into a 3-digit number, thus making the command short and crisp. Through this comprehensive guide, we hope that you will get hands-on with the chmod command in Linux.
People are also reading: