

It is a testing tool which is an open-sourced and cross-platform mobile application. Appium is broadly used by testers to automate their test cases due to the capability to test all types of applications. It does not matter that it is a native app, hybrid app, or web app as well as Android or iOS-specific, Appium can easily manage it. Appium is an HTTP server that can process requests to a UIAutomator which includes web driver commands for testing purposes.
Appium Features
As we know that Appium is used in various industries due to its broad range of features. So let’s discuss different features of Appium in brief
- It supports WebDriver Protocol: Appium's WebDriver Protocol provides greater control over web UI and automation without interfering with the JS working on the page. It still is reserved Compatible with a JSON Wire Protocol.
- Parallel Execution: It offers users for executing test automation scripts on various Android or iOS sessions. It can be achieved through UI Automator, UIAutomation, and Xcode9.
- Multi-Platform Support: It can perform test cases across various platforms. Appium supports Android, Windows, and iOS applications.
- Strong Test Execution: It can efficiently perform tests despite the device being available locally or being on the remote server. All tests can be observed in real-time as well.
- Rebuild application is not required: It does not reinstall the application of being tested on the system over and over. It does not require access to the source code of the application.
The installation process of Appium on Windows
First, you need to download the following for starting the process:
- Android Studio
- Java
- Latest Appium Client Library
- Appium Jar files for Java
- Appium Server
- After the successful download, install Java on your device, and it is essential to set environment variables.
- Now, you have to install the Android studio through the install and create the new project.
- You have to extract the client library and store them individually in the file with the Appium jar files.
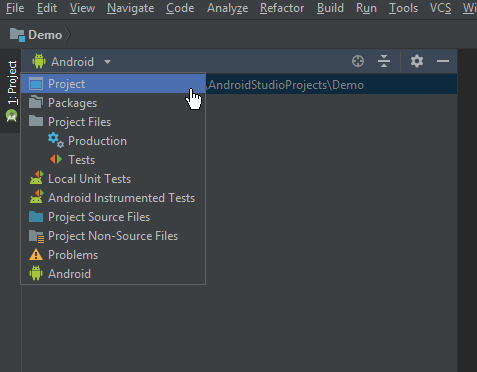
- Now, switch to a project view in the Android studio.
- You have to select the files (extracted client library) and store it in the lib folder below the app directory. Now select all of them and add them as the library.
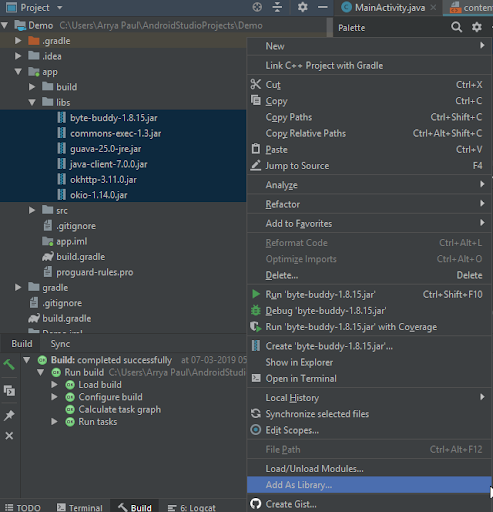
- After adding the files as the library, you need to see the build.gradle file in an app folder.
- Now, Double click on that and rebuild your project.
The installation process of Appium on MAC First, you need to install java, so go on the java download page then download the ‘dmg’ file. It will ask you to accept the licensing agreement. After the successful installation of java, you have to enter the following code in the terminal for checking whether the installation process was successful. This command shows the version of the installed java.
java -version
Now, you have to set up the specific environment variable as well as a path to enter the following code in the terminal
vim ~/.bash_profile
It opens the vim-editor, so dress I for entering in insert mode then enter the following code:
export JAVA_HOME = $(/usr/libexec/java_home)
export PATH = $JAVA_HOME/bin=$PATH
export PATH = /usr/local/bin:PATH
After entering the mentioned code, you have to press the escape key and enter “:wq“.It will return you to a terminal interface. Enter the code for passing the path as the argument:
source ~/.bash_profile
It is time to install Xcode through the app store and search for Xcode at the app store and then install it. After installing Xcode, you need to install homebrew in the system so Copy the following code and paste it in the terminal:
/usr/bin/ruby -e "$(curl -fsSL https://raw.githubusercontent.com/Homebrew/install/master/install)"
Once you run the above code completely, you have to run the following commands:
brew update
brew doctor
xcode-select --install
After running the above steps, Xcode will completely be installed, so you need to download the Appium server. Go on the official website and download the Appium. Now click on the DMG file after completing the download, and you have to follow the on-screen instruction. After the successful installation of Appium, drag and drop it in the application folder and it finishes the installation of Appium.
Conclusion
This article provides complete information about the Appium and its installation process on Windows and Mac devices. As we know, Appium is a testing tool which is an open-sourced and cross-platform mobile application. Appium is broadly used by testers to automate their test cases due to the capability to test all types of applications. It does not matter that it is a native app, hybrid app, or web app as well as Android or iOS-specific, Appium can easily manage it. You will gain complete information about the installation process in Windows and Mac as well as all required aspects of the installation. People are also reading:
- iPhone Data Recovery
- Best iOS Emulator
- How to find Wifi Password on Windows 10?
- Best Android Books
- Best Android Lock Screen Removal for Your Smartphone
- Best Software for Android Data Recovery
- How to make an App?
- Android Architecture
- Android Interview Questions & Answers
- 8 Best Android Emulators for Windows and macOS